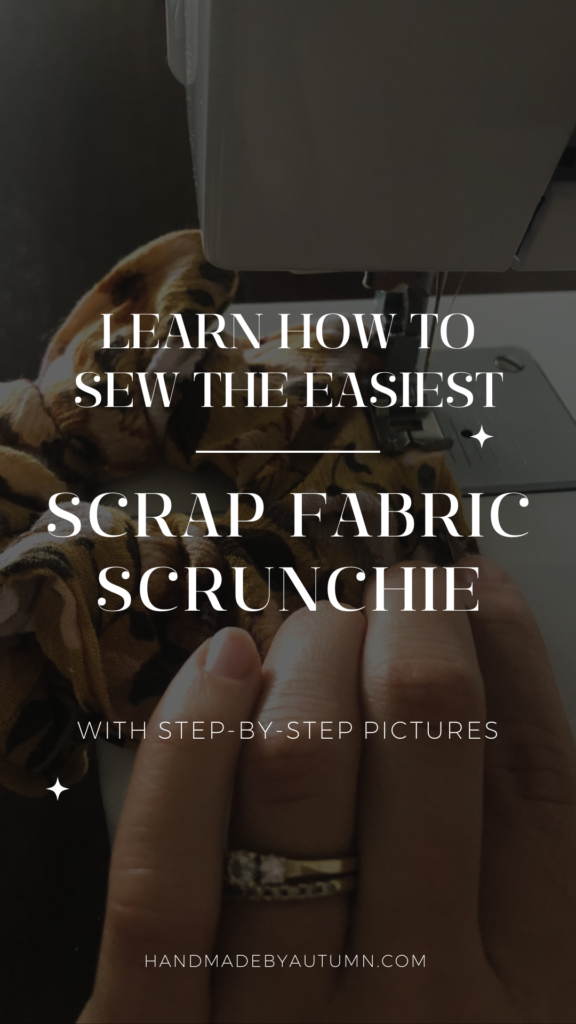
Learn how to DIY an easy scrunchie that requires only a hair tie, scrap fabric, thread, and a sewing machine! In this tutorial you will learn how to easily make big and fluffy scrunchies. It is the perfect project for any sewer- no matter the level of expertise!
I fondly remember wearing scrunchies in my hair as a kid back in the 90’s/ early 2000’s.
There is one scrunchie that I remember particularly well. It was light blue with little strings all over it.
This scrunchie hung around my house for what seemed like forever, but now it’s lost.
I may not have this scrunchie anymore, but I am excited to see that scrunchies of all kinds are back in style again!
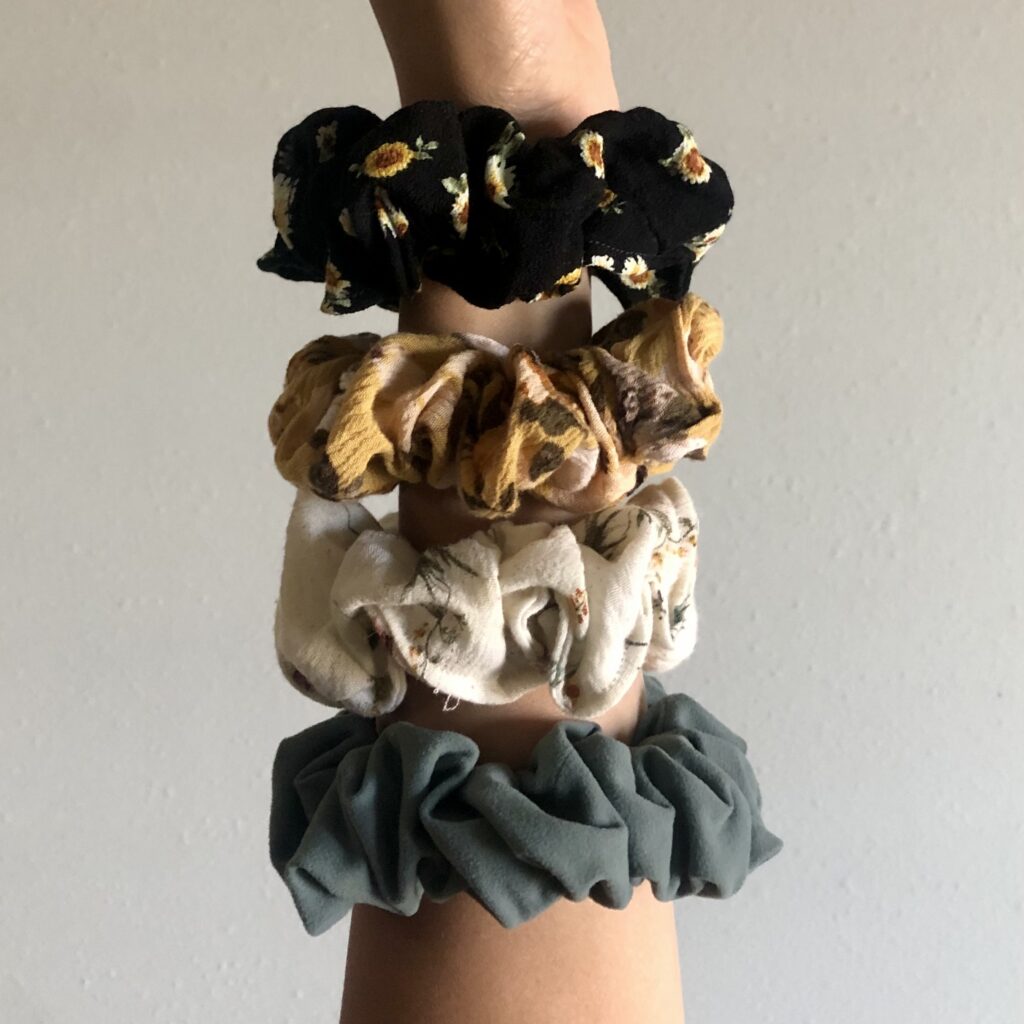
I really enjoy wearing scrunchies. Scrunchies pull back my hair while allowing me to still feel cute and fashionable. They are the perfect add-on to any ponytail or braid!
And, as an added bonus, scrunchies are so fun and easy to make. They take little time to pull together, and I have found them to be the perfect use of my scrap fabric.
In fact, just about all of my scrap fabric eventually turns into a scrunchie. If I get more than 1 scrunchie out of a pattern, I simply gift the rest to friends.
Scrunchies are the perfect project for your scrap fabric, they are useful and cute, and they make great presents! What isn’t to love??
What is a scrunchie?
A scrunchie is a ponytail or elastic covered in fabric. They are typically used to pull back medium- to long- length hair. However, many people also enjoy wearing them on the wrist in replacement for a bracelet.
Why are scrunchies so great?
There are many reasons that scrunchies are so amazing! Here is a list of just a few of those reasons:
- Scrunchies prevent hair damage. The fabric that covers the elastic is soft. A soft fabric is much more gentle on hair than what a typical ponytail is. With a scrunchie, your hair shouldn’t get knotted, break, or get pulled out.
- Scrunchies don’t leave marks in your hair. This means that you can take your scrunchie on and off throughout the day and your hair will still look great!
- Scrunchies add to your outfit! Scrunchies are cute, and as a result, they easily enhance an outfit. Personally, I always feel much cuter when I have a scrunchie in my hair as opposed to a plain ponytail.
- Lastly, scrunchies look cute on the wrist! Scrunchies add to your outfit while worn on your wrist, and if they are on your wrist they are always there for those last-minute needed up-do’s!
What supplies will I need to make a scrap fabric scrunchie?
The supplies needed for this project are minimal, making the project even better and easier! Here is a complete list of everything you will need:
- Fabric (no smaller than 5×28 inches)
- Ponytail
- Thread (color should compliment fabric)
- Scissors or rotary cutter & mat
- Sewing machine
- Sewing needle
What is the best kind of ponytail to use for a scrunchie?
An average sized ponytail works best for making scrunchies.
I have tried using thin ponytails, but they broke too easily. And, thick ponytails might be seen through the fabric.
However, if your hair doesn’t work well with an average sized ponytail, I would use the size that works the best for your hair type.
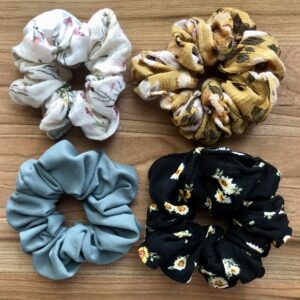
What is the best fabric to use for a scrunchie?
This tutorial calls for any scrap fabric that you may have, and in the end you will get a great scrunchie no matter what! However, I have found that the thinner and more flexible the fabric is, the better the scrunchie will turn out.
I like my scrunchies to be big and fluffy. A thick or stiff fabric will not puff out as easily as thin fabric will. A thick fabric might also be harder to work with in your hair. But, again, you can certainly use a thicker fabric and you will still get a great scrunchie!
Some popular material used for scrunchie making is satin, velvet, or cotton. But, note that satin or velvet may be harder to work with.
How do I make an easy scrap fabric scrunchie?
1. Prepare the materials
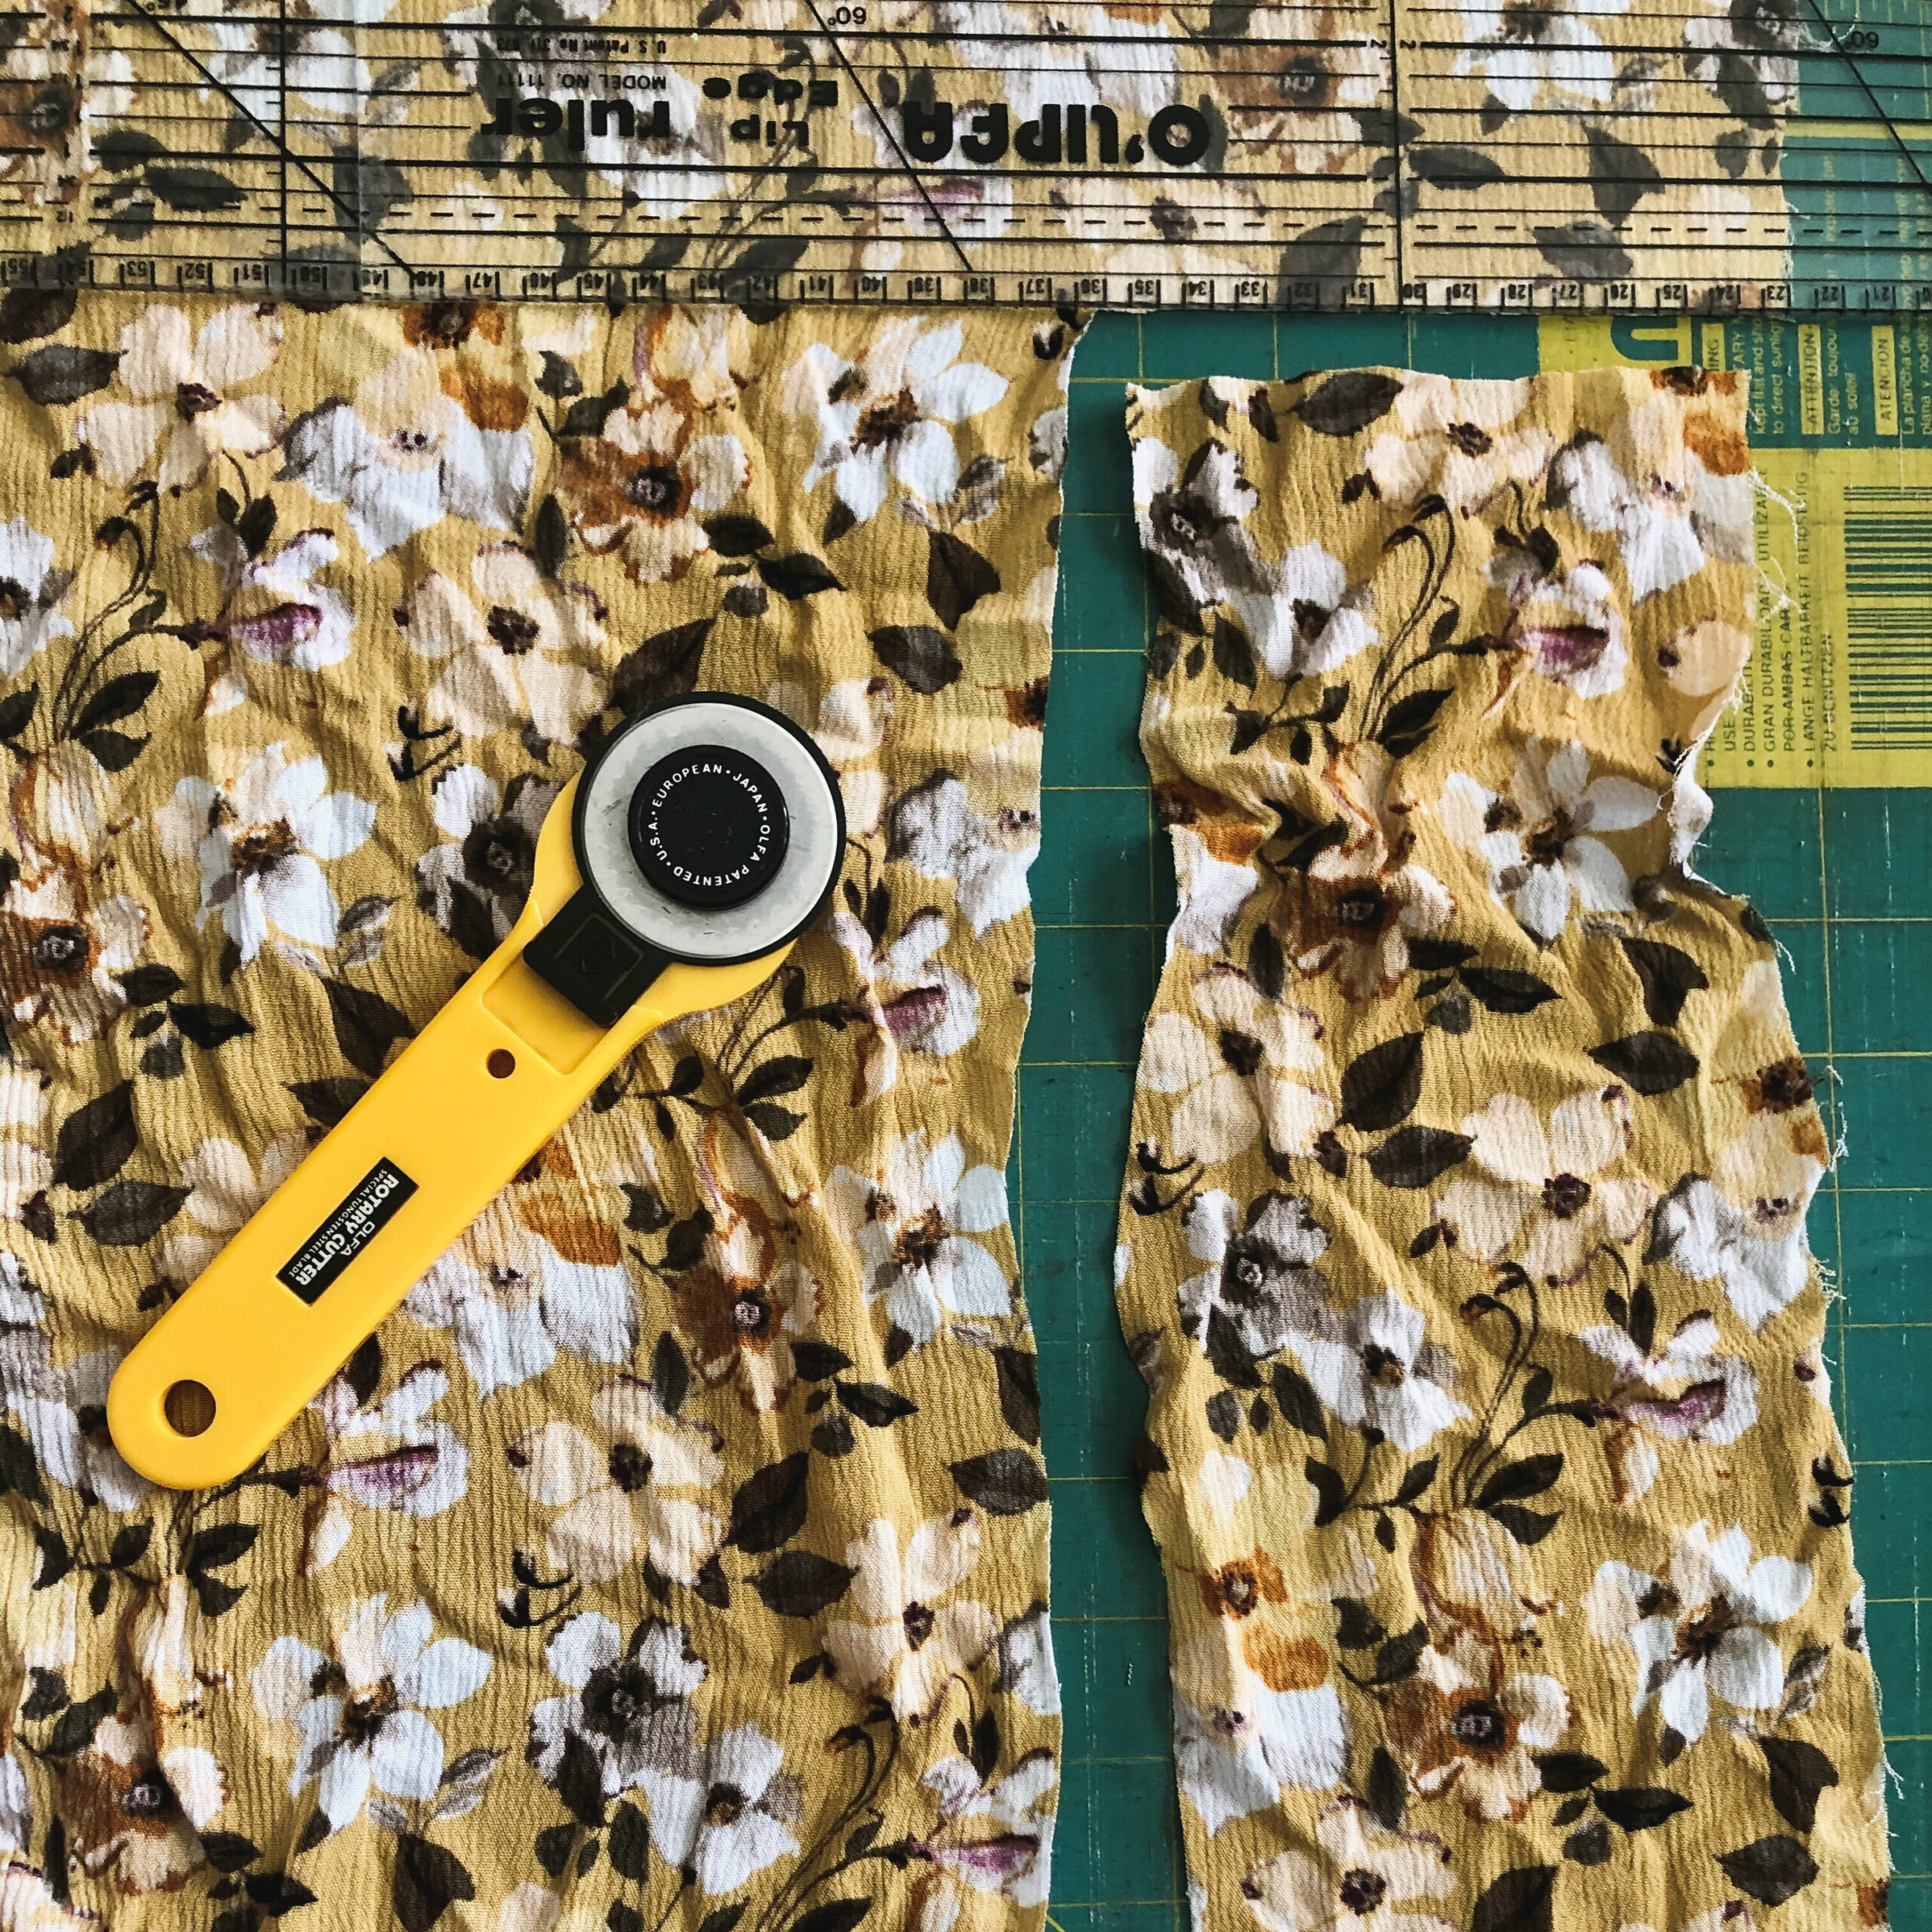
Gather all of your materials. Then, you can begin by cutting out a rectangle of fabric that measures 5 inches by 28 inches.
I used my rotary cutter and mat, because I find it the easiest way to cut the fabric.
However, you can use a scissors if that is easier for you. If you go the scissors route, I would recommend drawing your measurements and lines onto the fabric so that you get a straight edge when you cut it out.
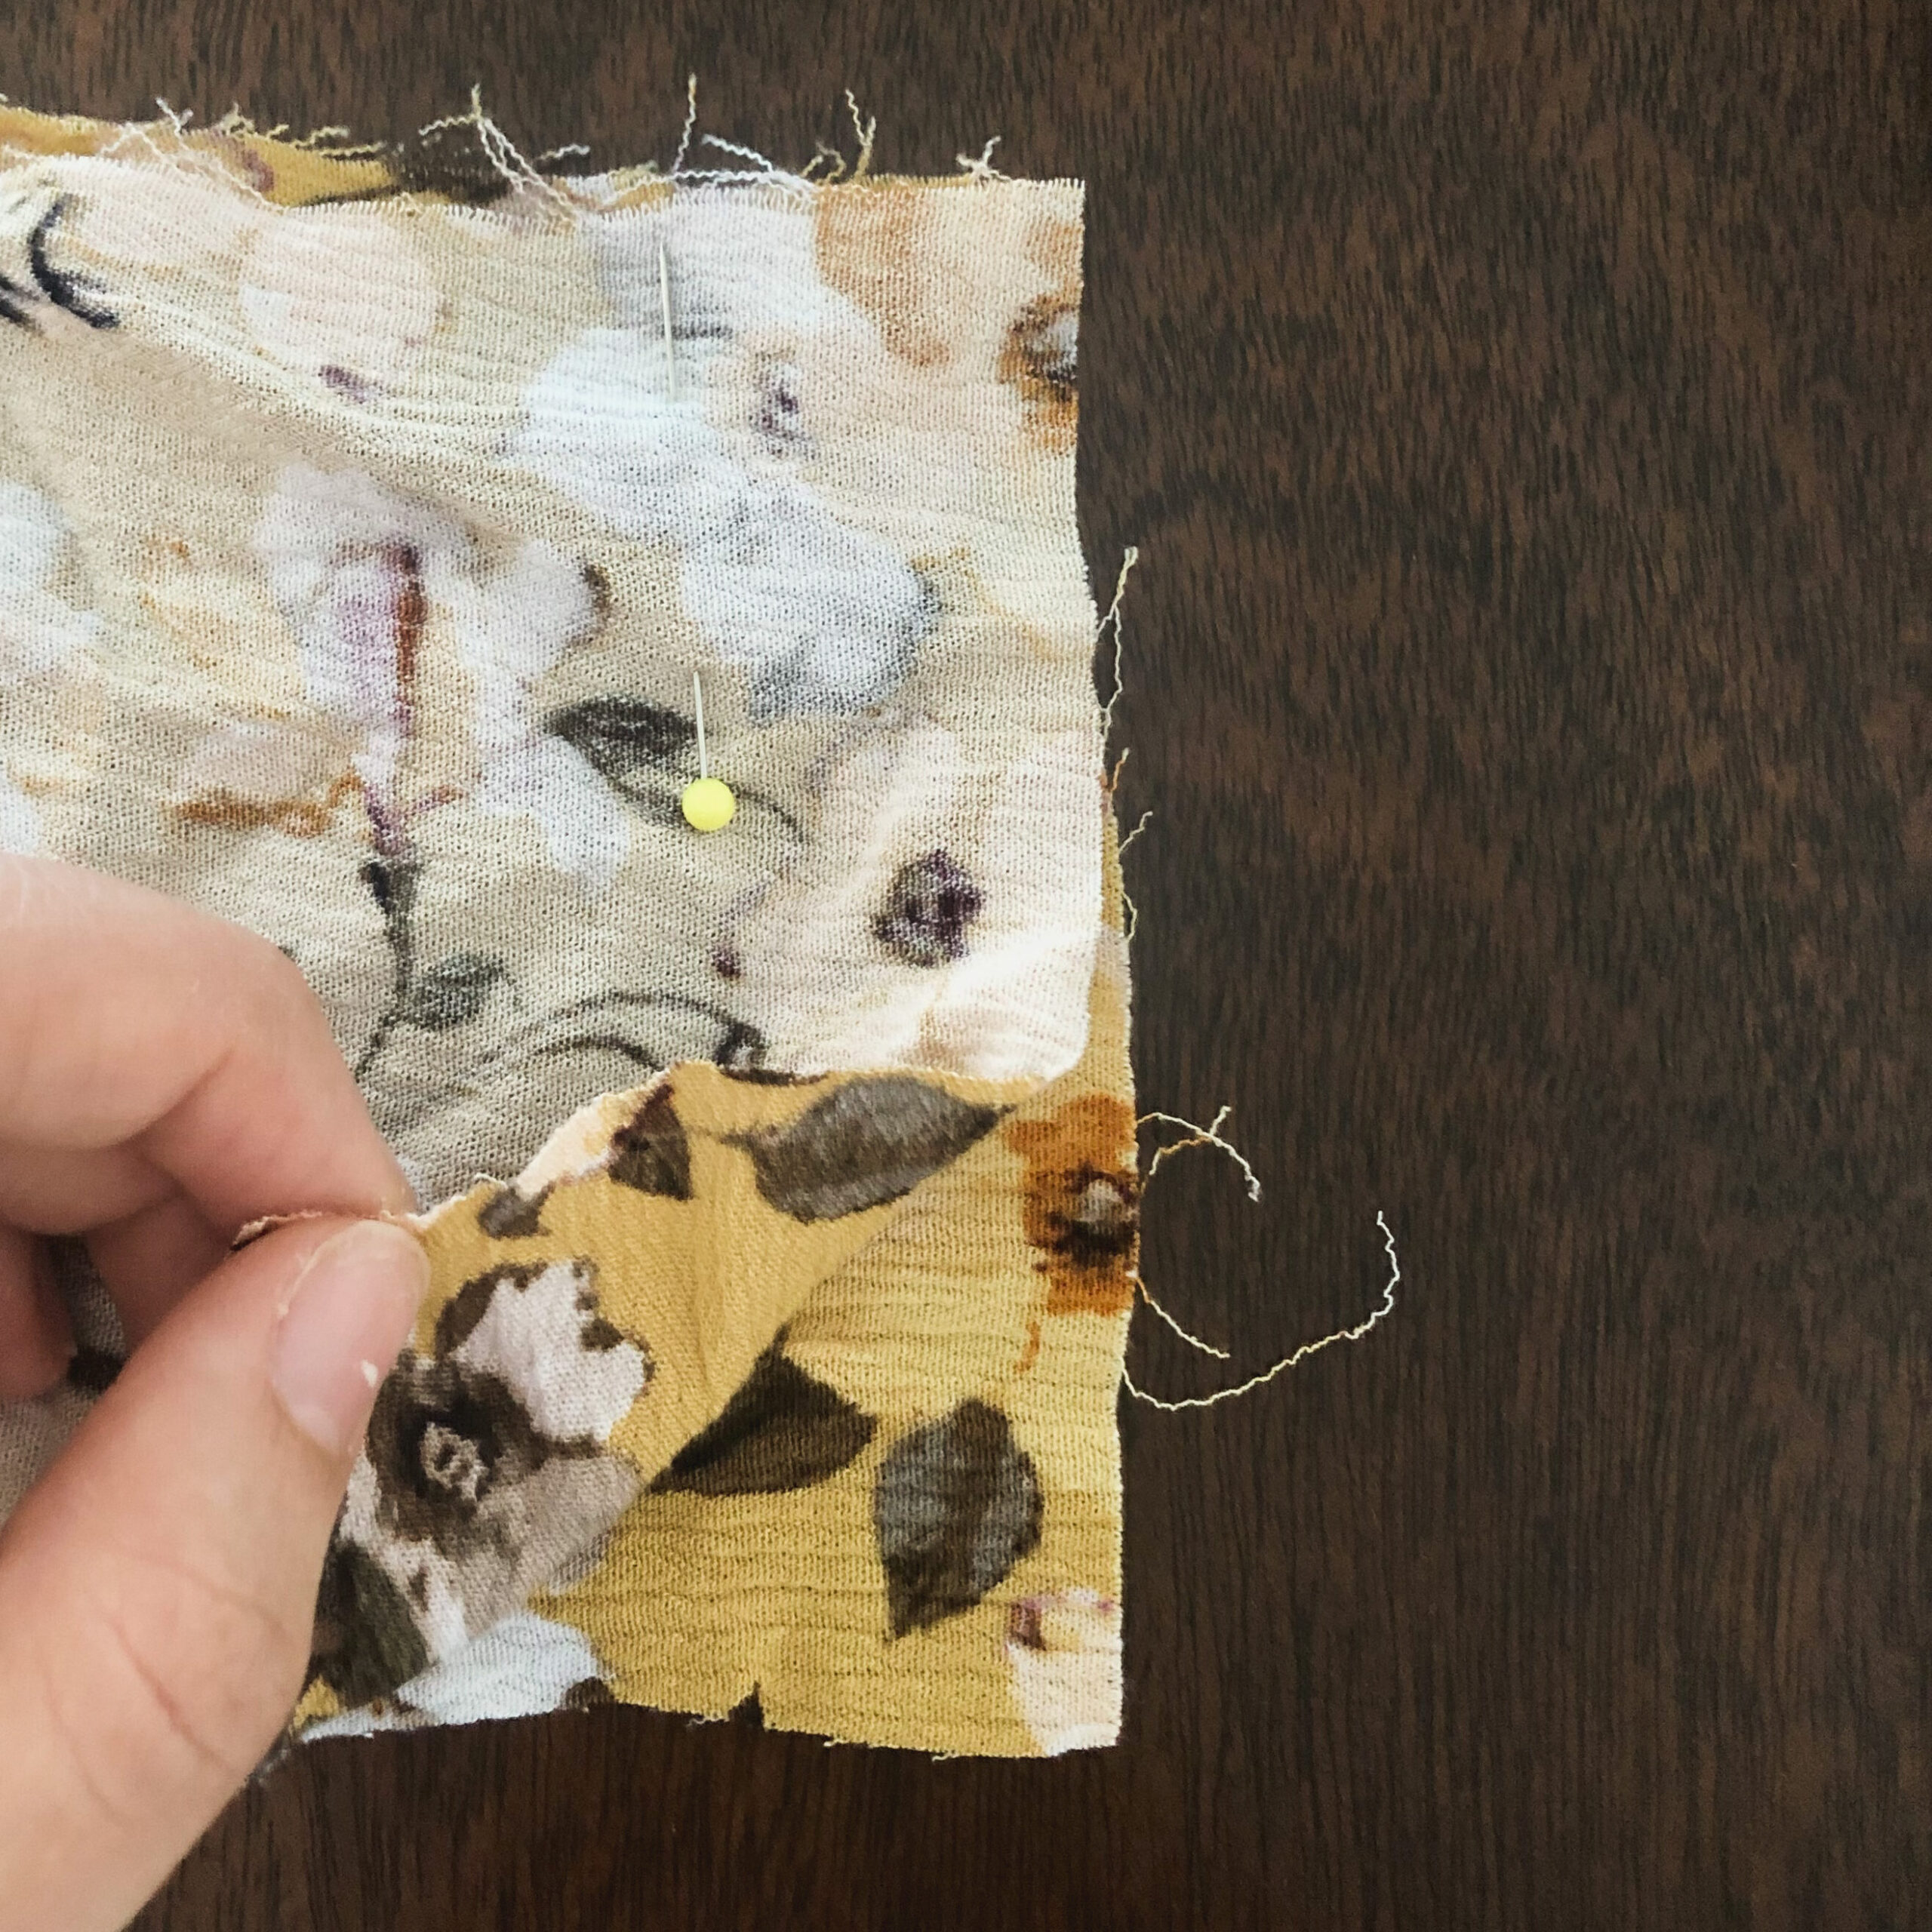
2. Sew the ends of the fabric
Next, you will need to take the 2 short ends (the ones measuring 5 inches) of the fabric and pin them together with the face of the fabric folded inward.
Once the fabric is pinned, sew those two pieces together with an 1/8 inch seam allowance (using a straight stitch).
*Note: It is important to make sure that the sides of the fabric that you would like to see on the scrunchie are facing together when you pin and sew the fabric. If they are not, your scrunchie will end up inside out.
*Notes: The seam allowance is the distance from the needle to the edge of the fabric. This pattern calls for a distance of 1/8 inch.
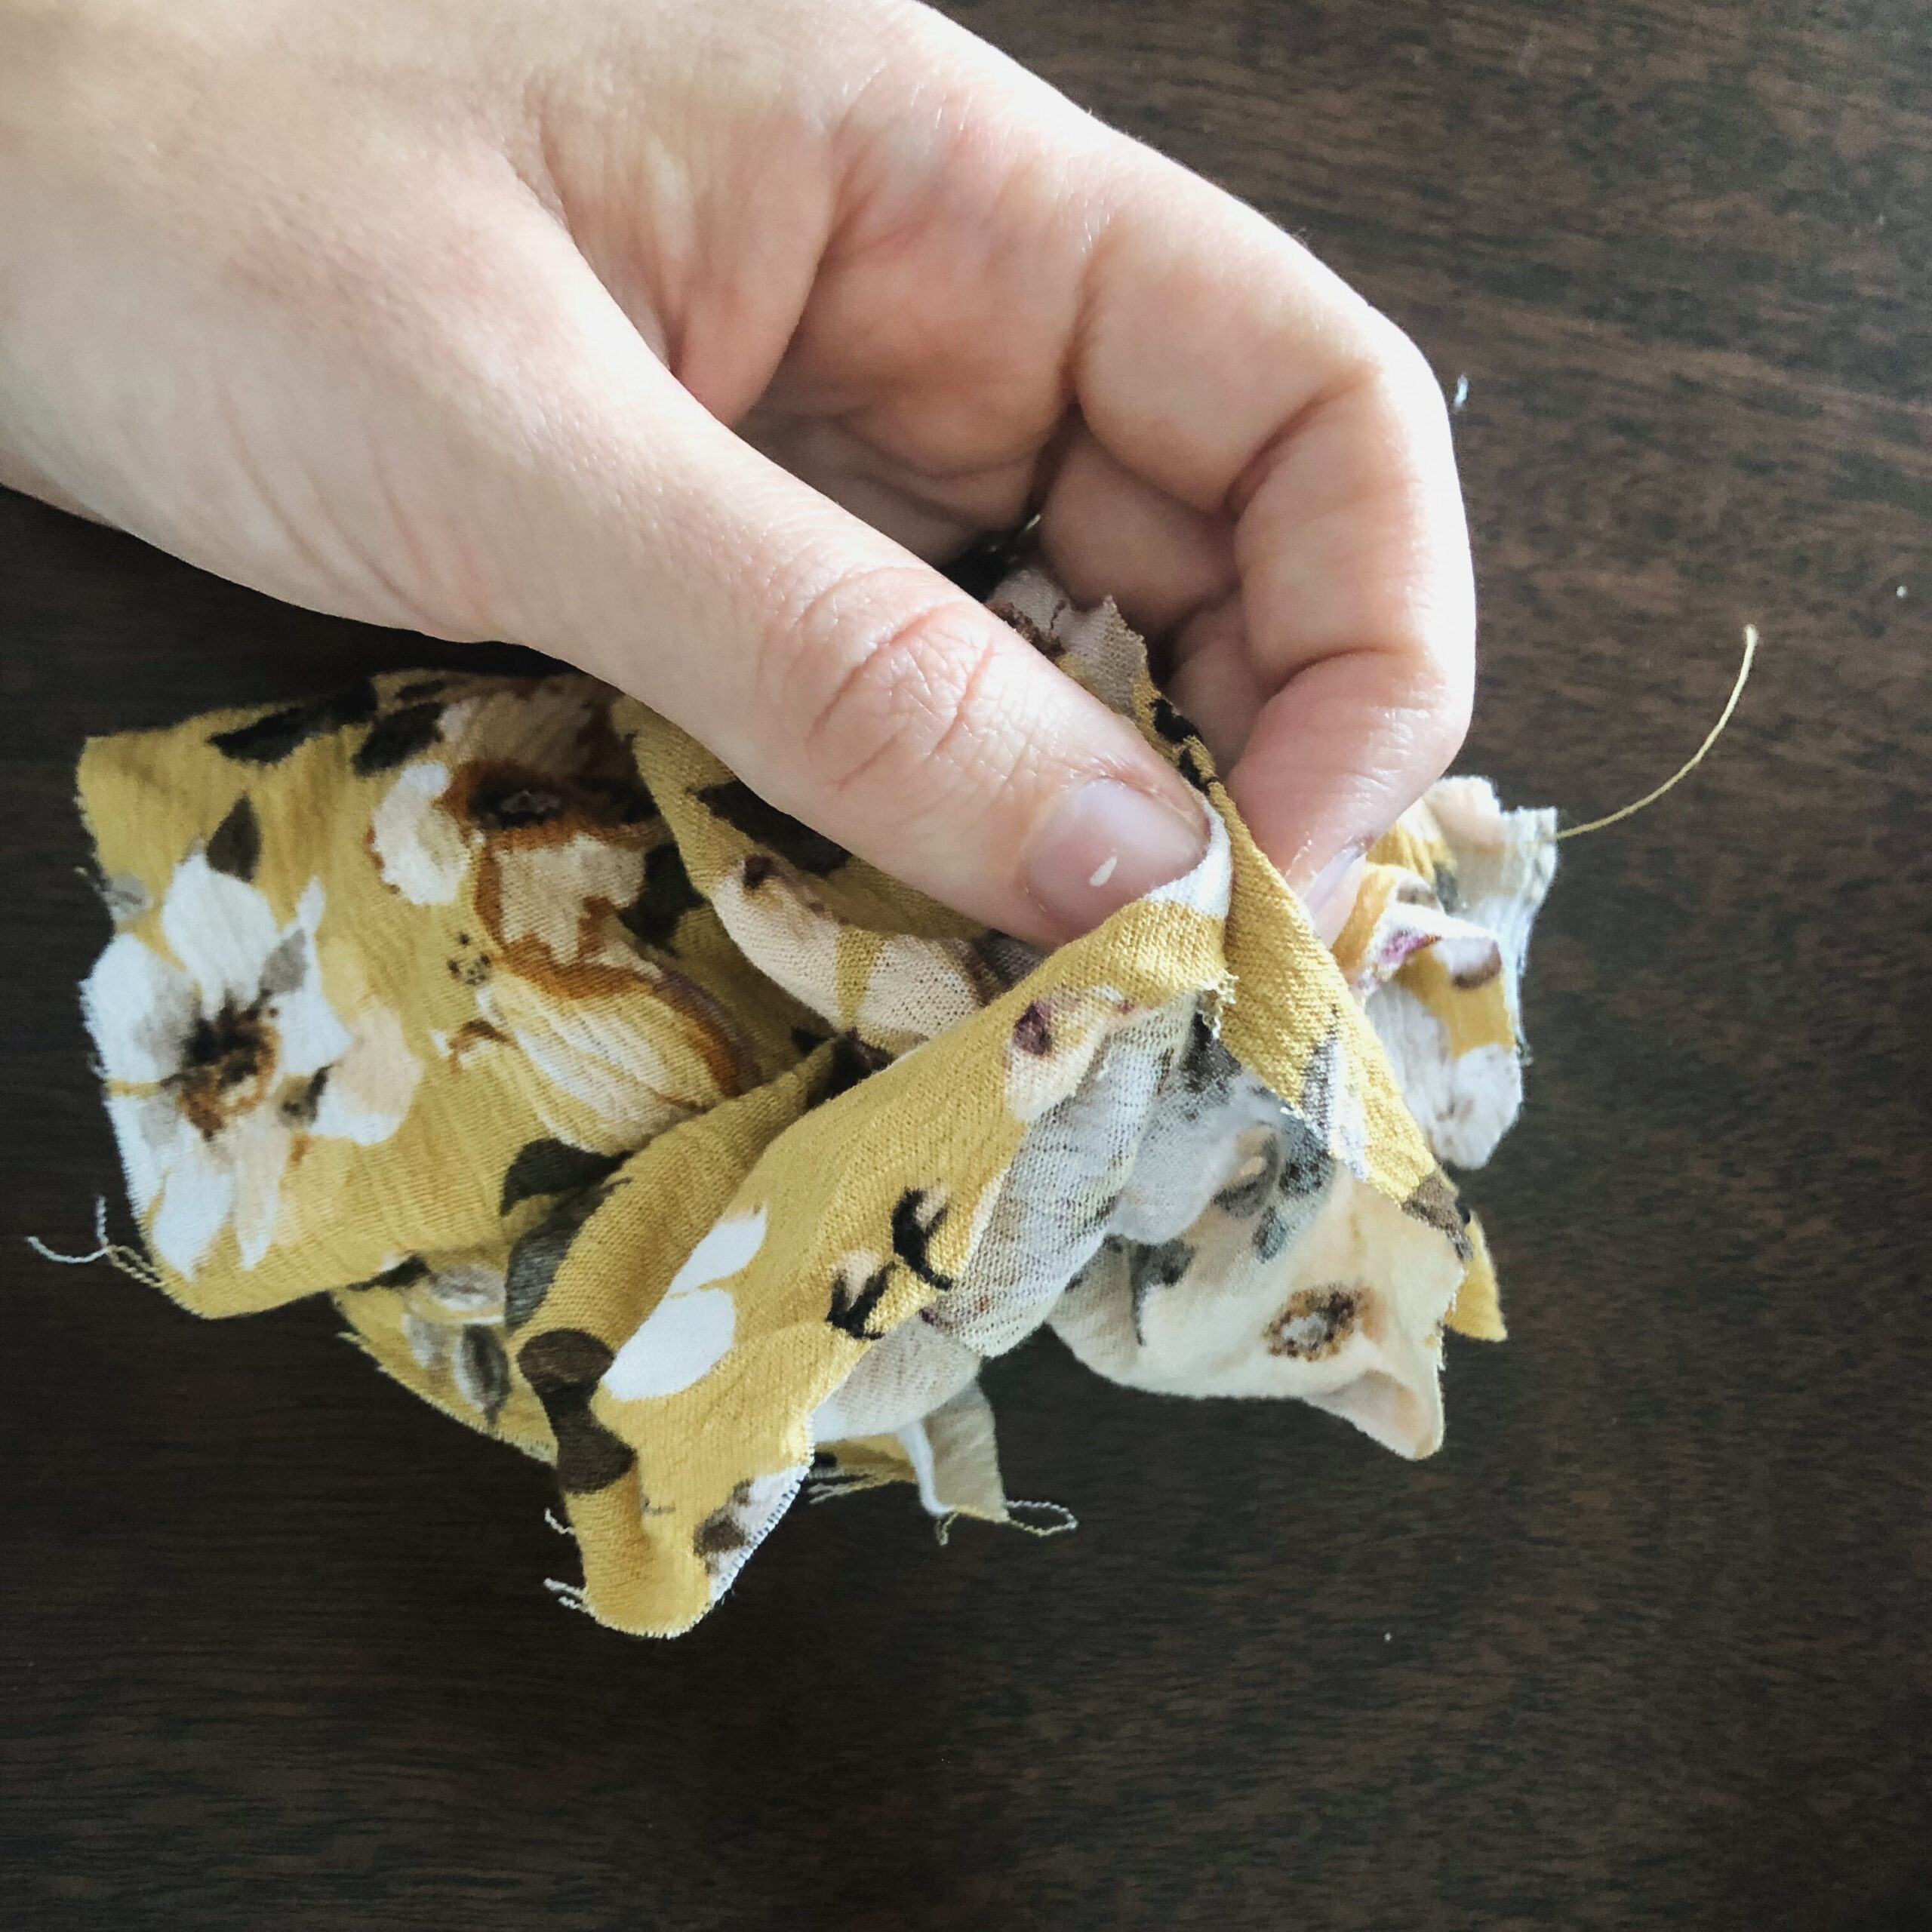
3. Shape the scrunchie
After the 2 short ends of your fabric are sewn together, you will need to wrap your ponytail on the outside of the fabric, as the picture shows below.
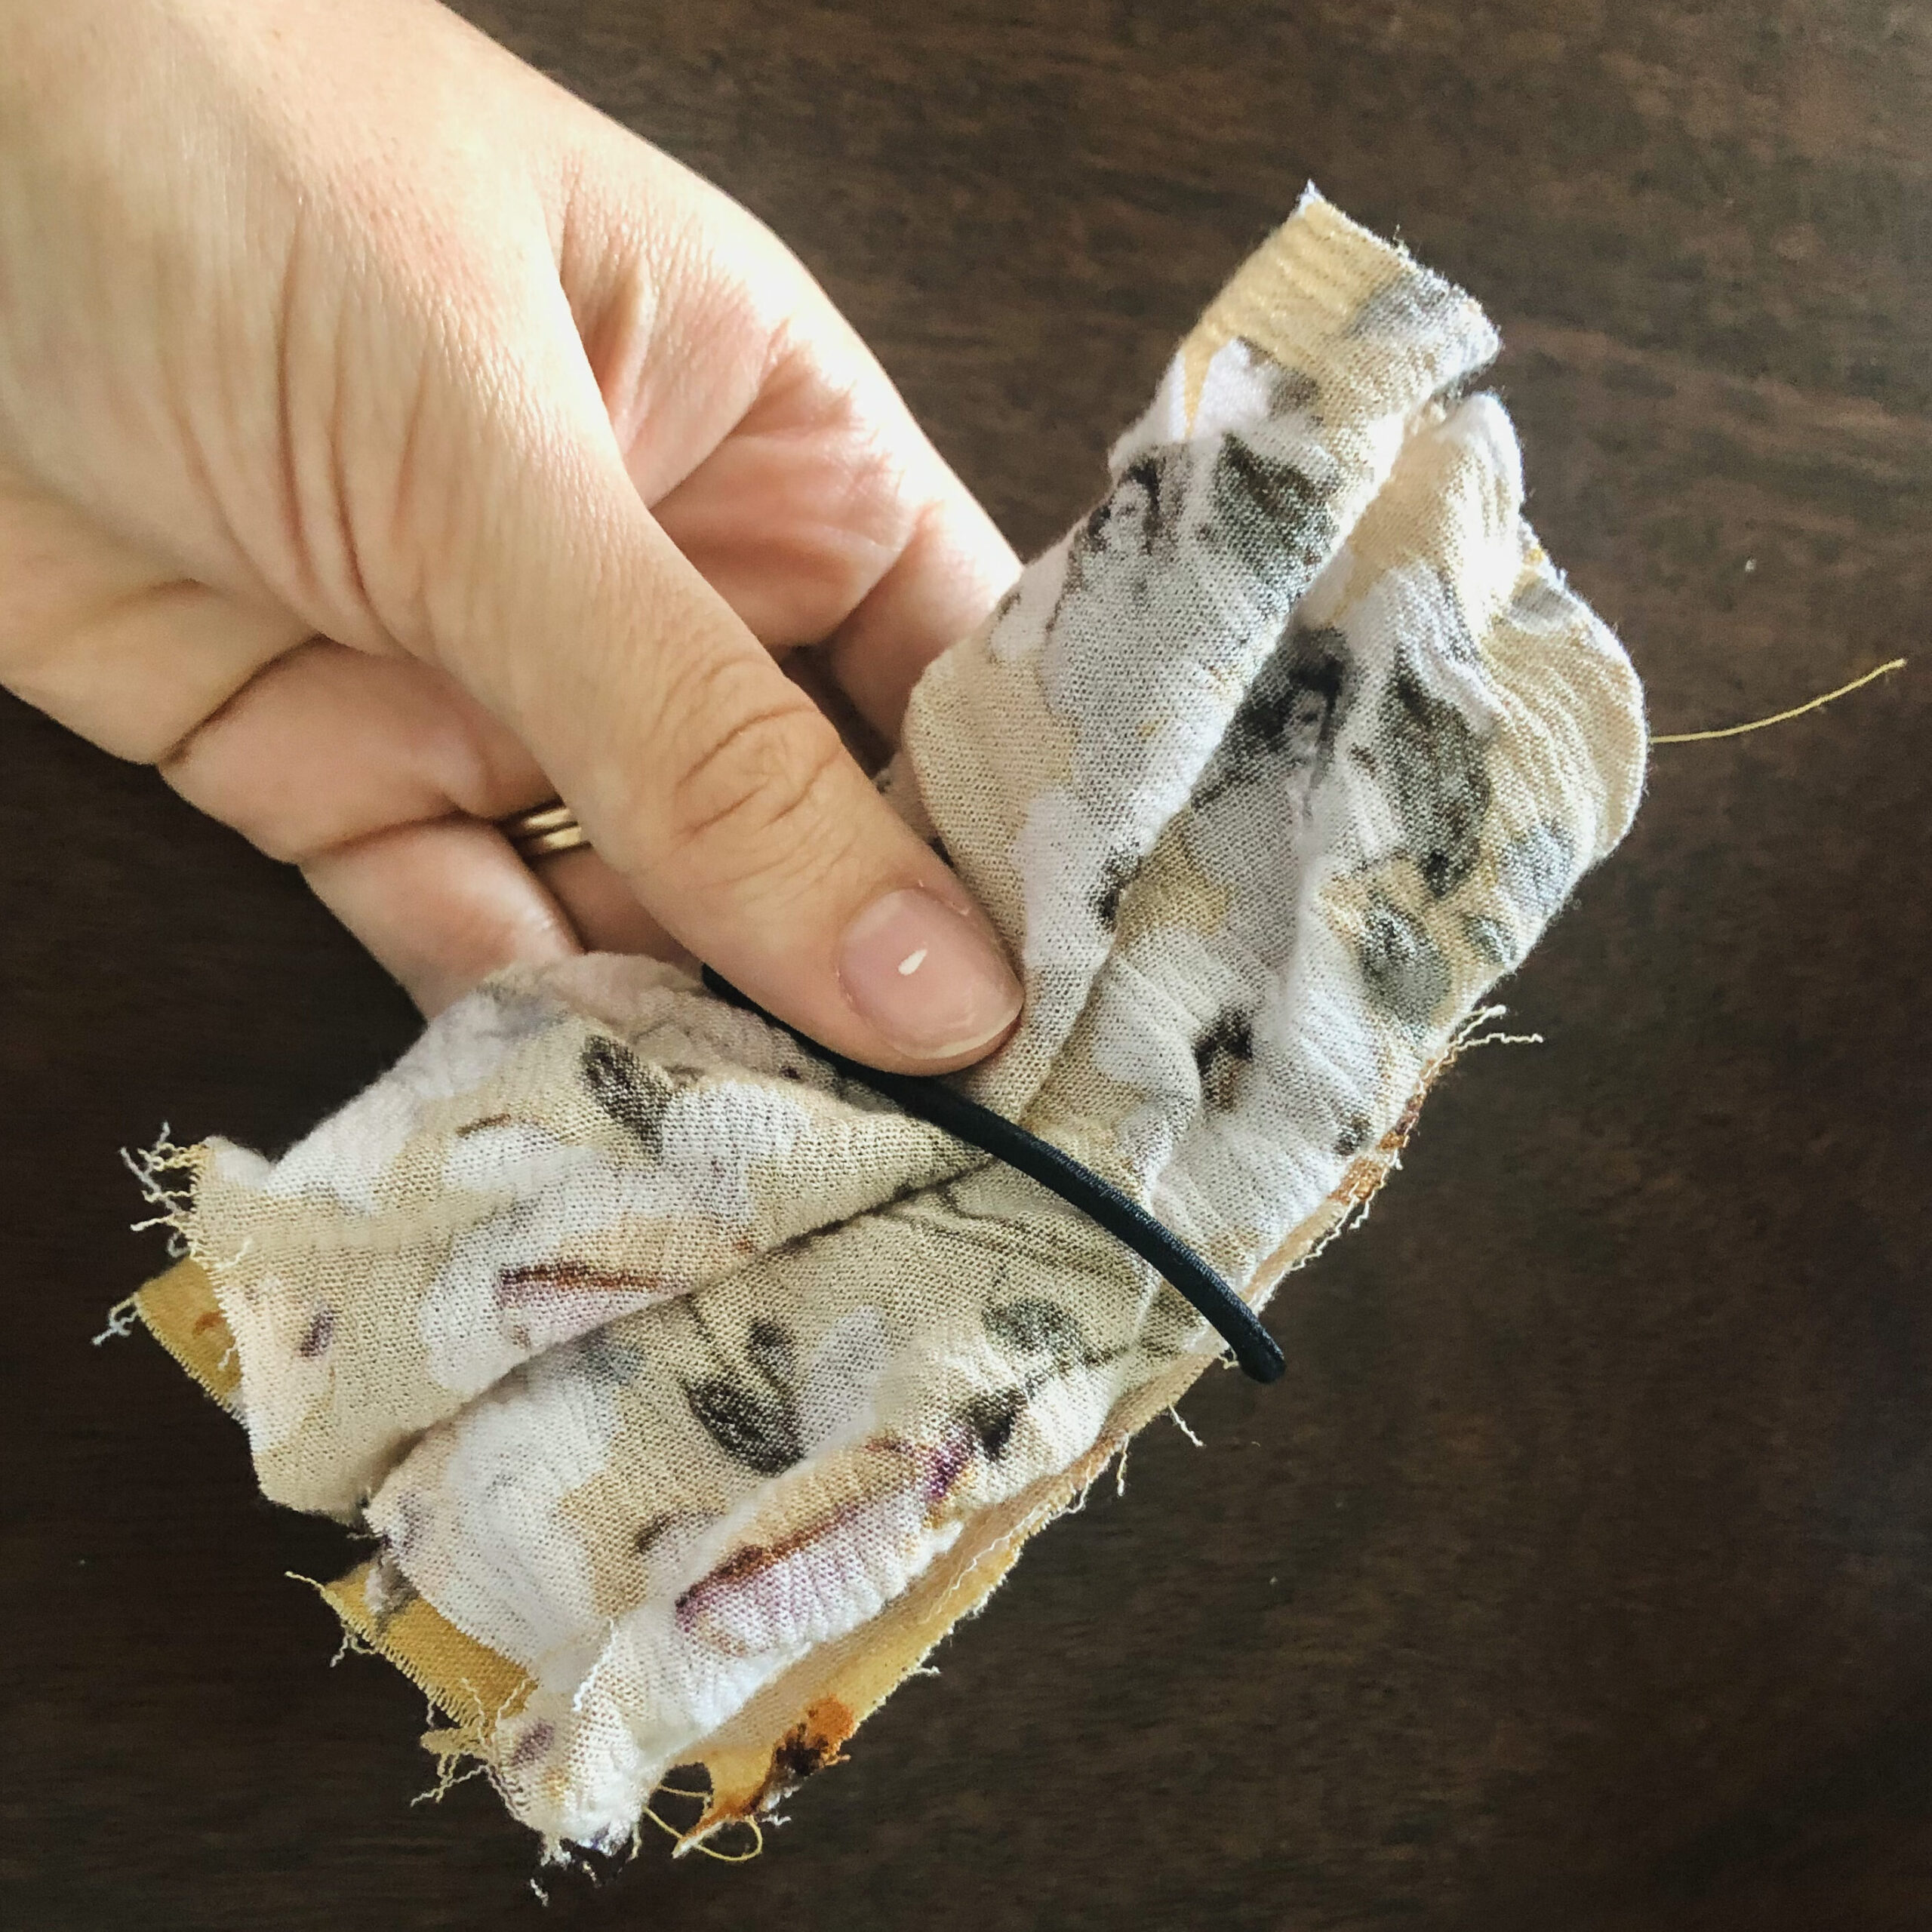
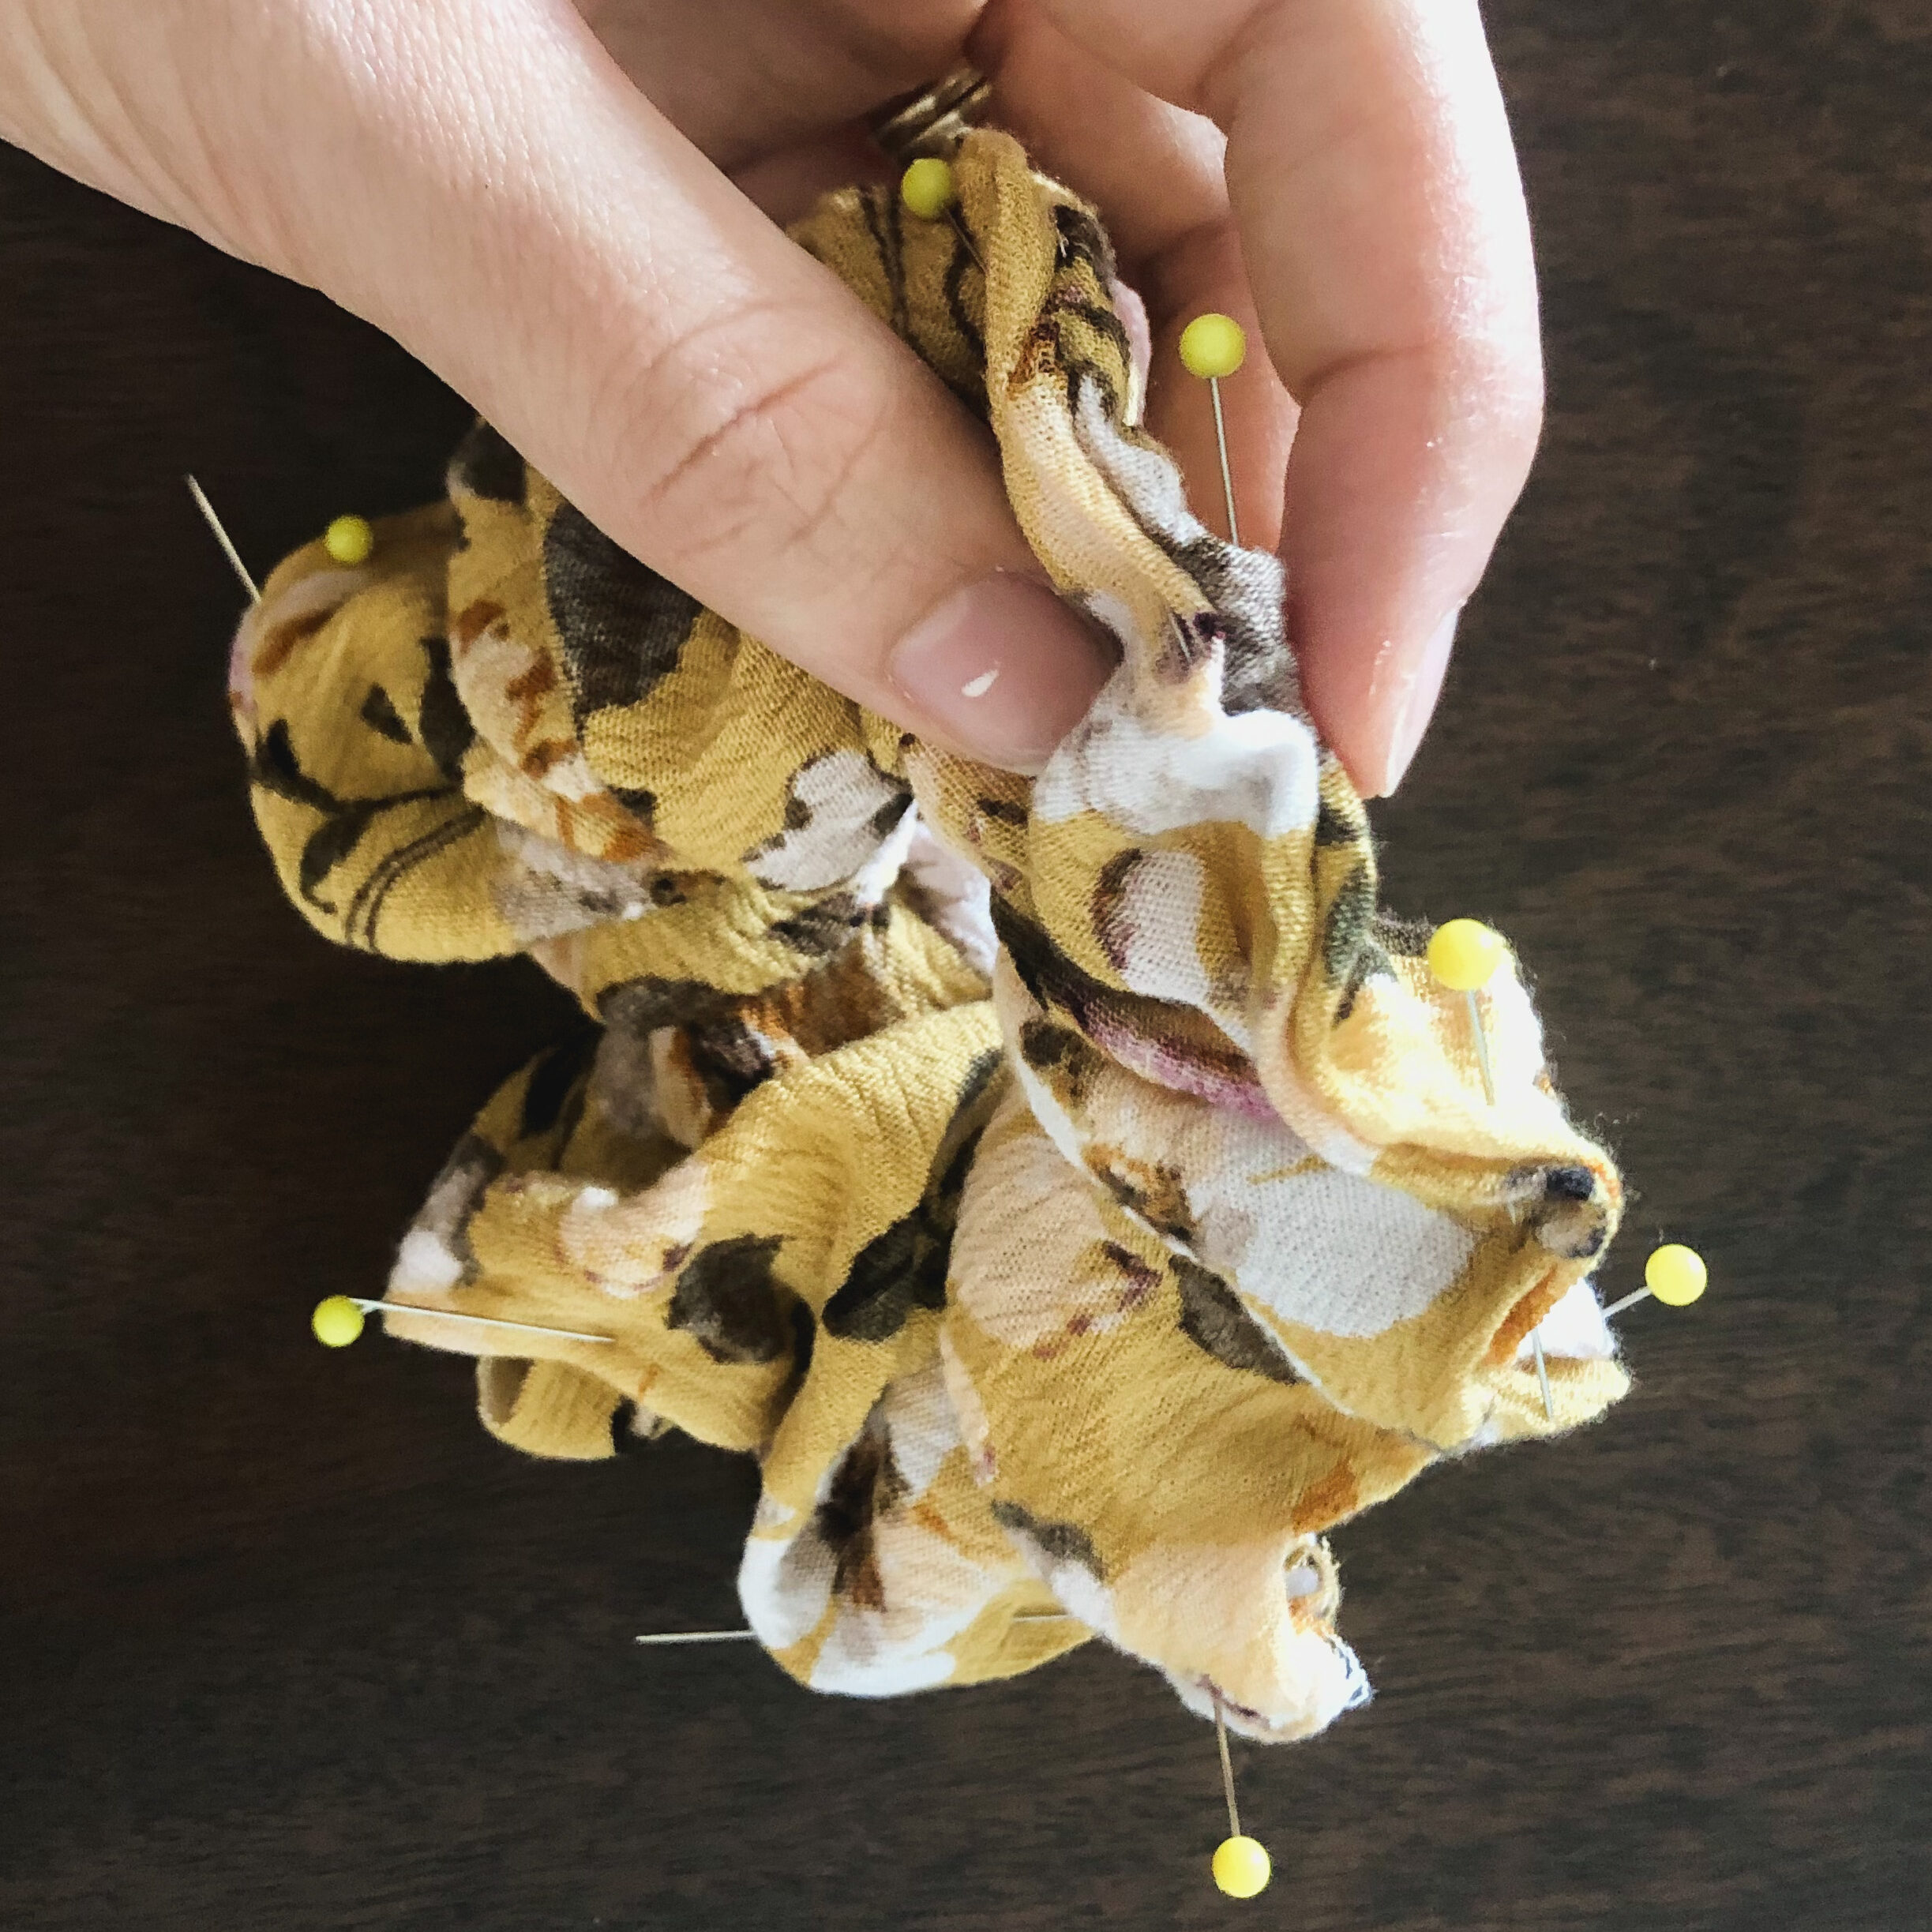
Next, fold each side of the fabric down by approx. 1/4 inch. As you do so, connect the two sides and pin it all in place. Do this around the whole scrunchie (careful- you will most likely be poked in the process!)
Once you have your scrunchie pinned, you should start to get an idea of what it will look like once it is done!
4. Sew the scrunchie
You can now sew the two sides of the scrunchie together with an 1/8 inch seam allowance (using a straight stitch).
I recommend removing the pins as you go in order to keep the needle-poking to a minimum.
The sewed scrunchie should look similar to the one below. You are almost there!
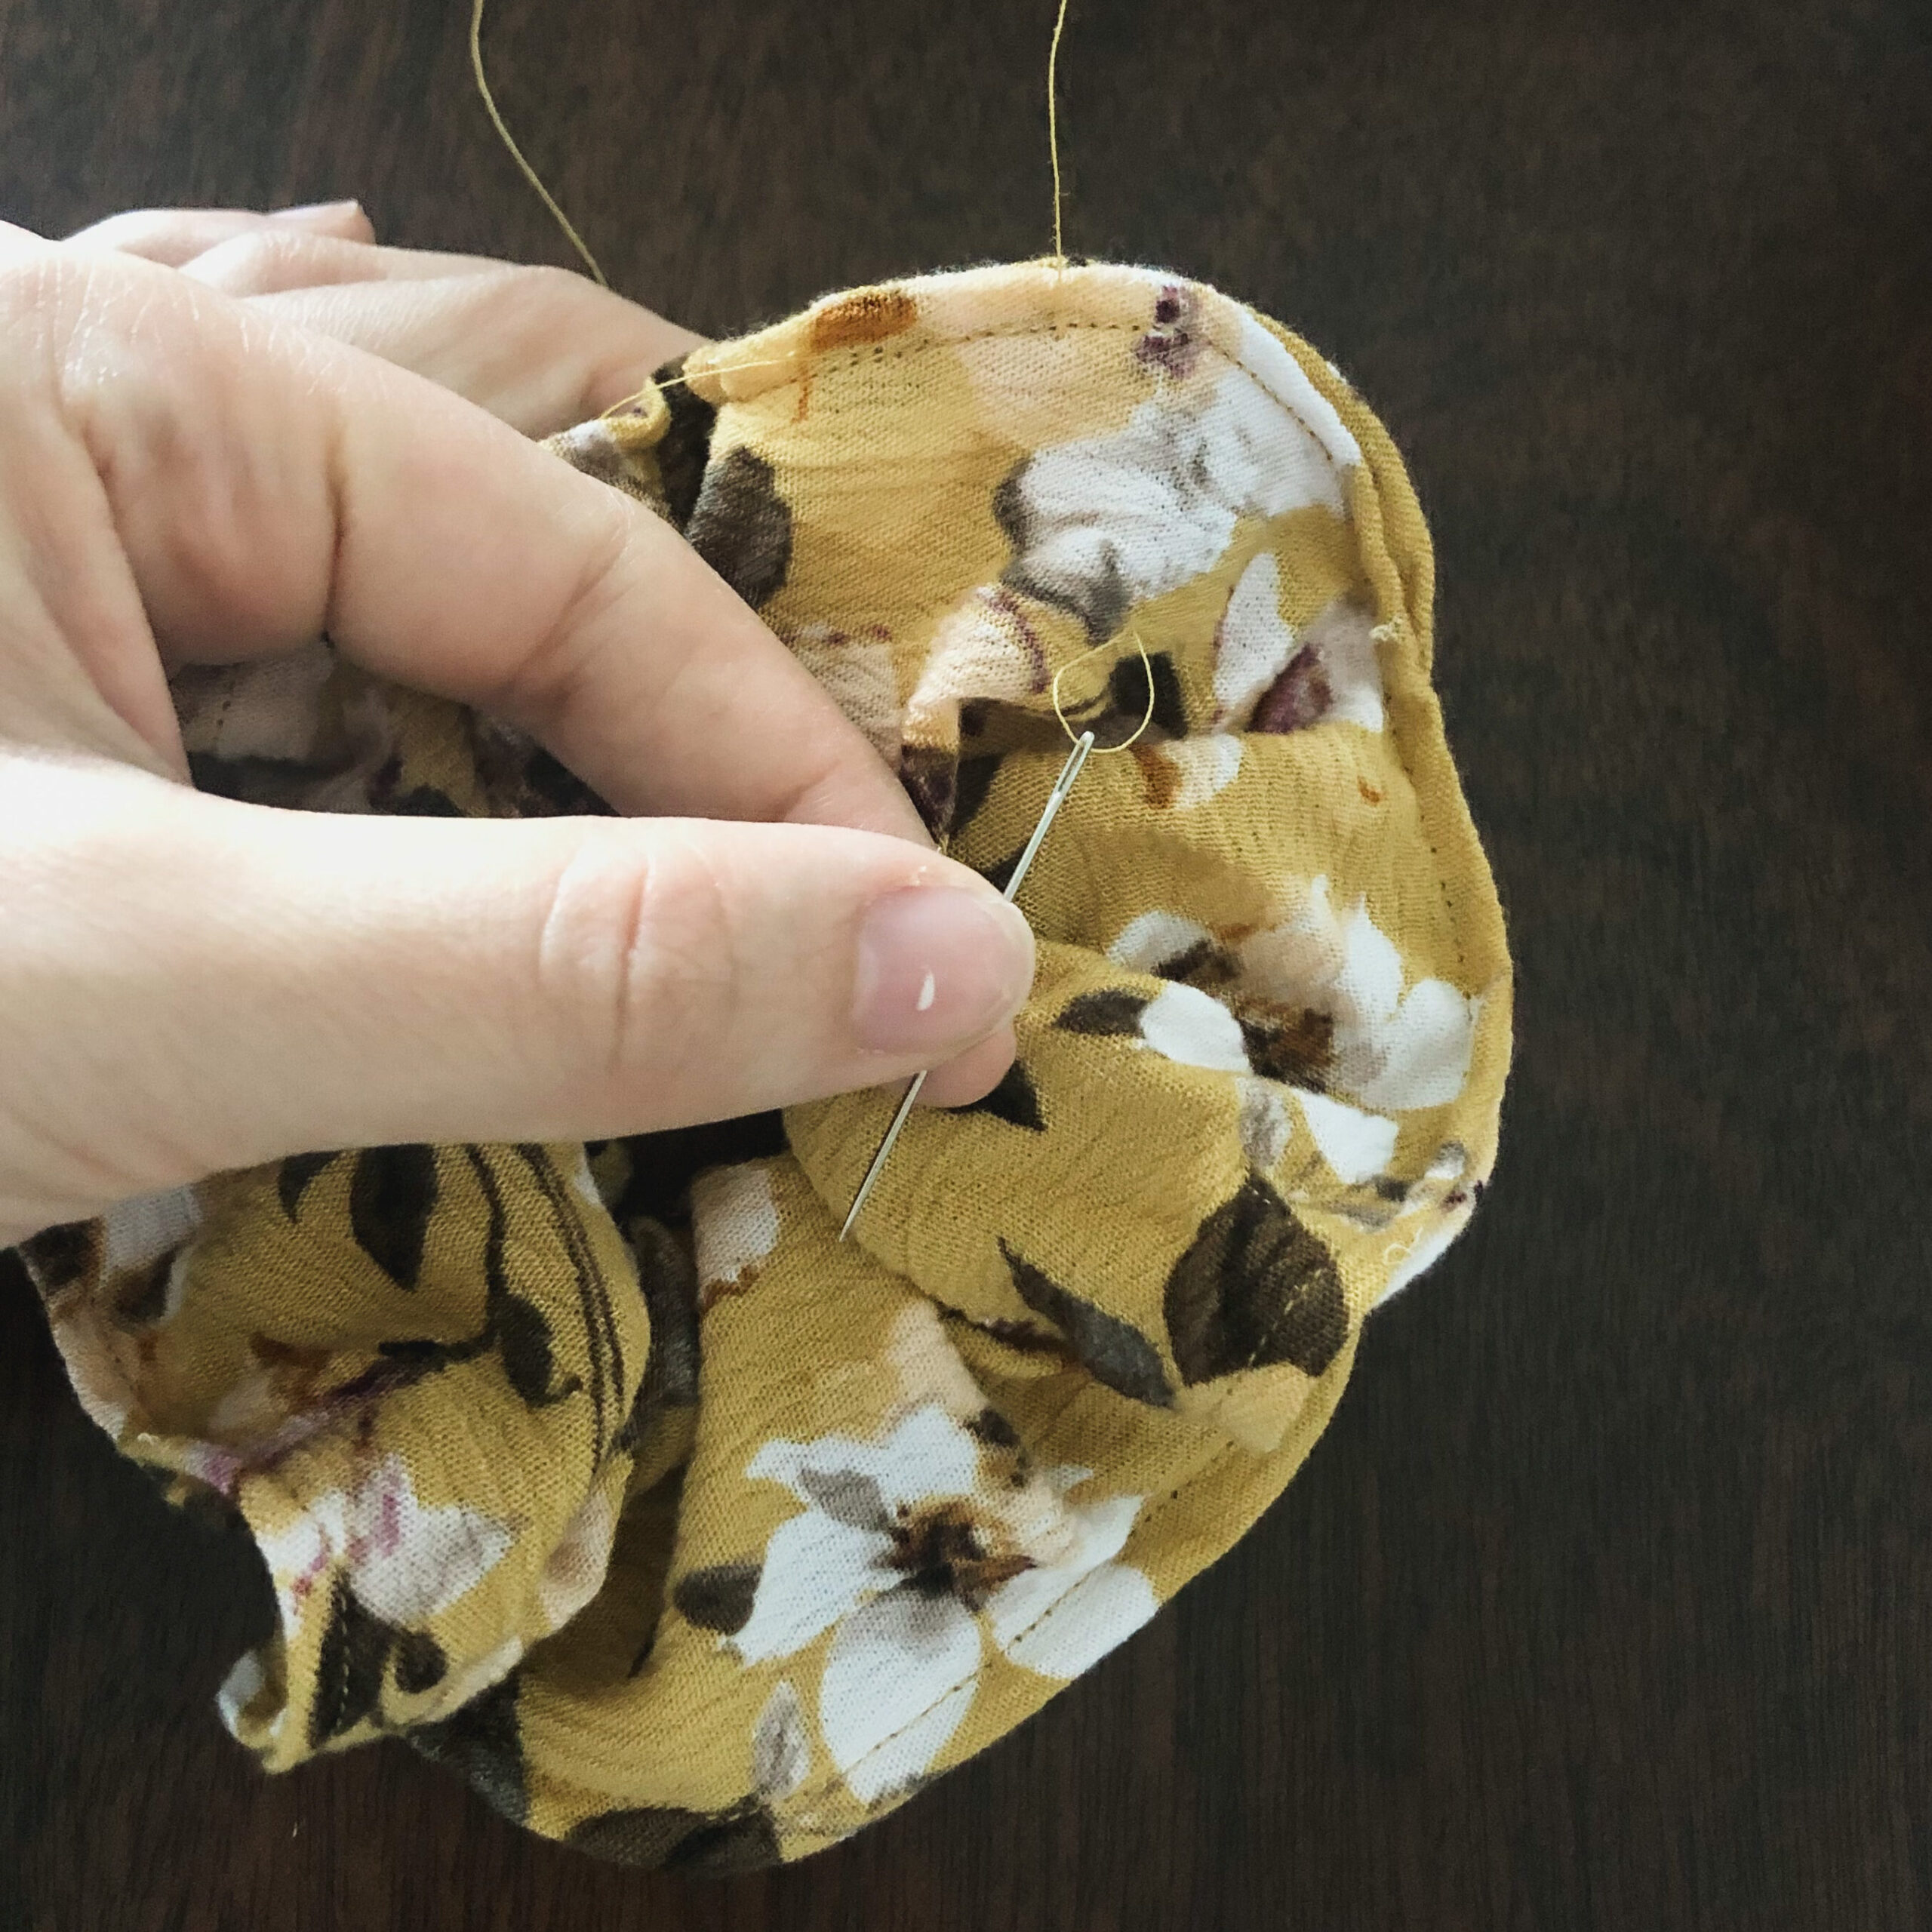
5. Finishing touches
Now, we need to get rid of the two extra strings.
Thread the strings into a sewing needle and spread the fabric apart to create a hollow center in the scrunchie. Run the thread through the gap in the fabric. Cut off any extra thread that might continue to hang out.
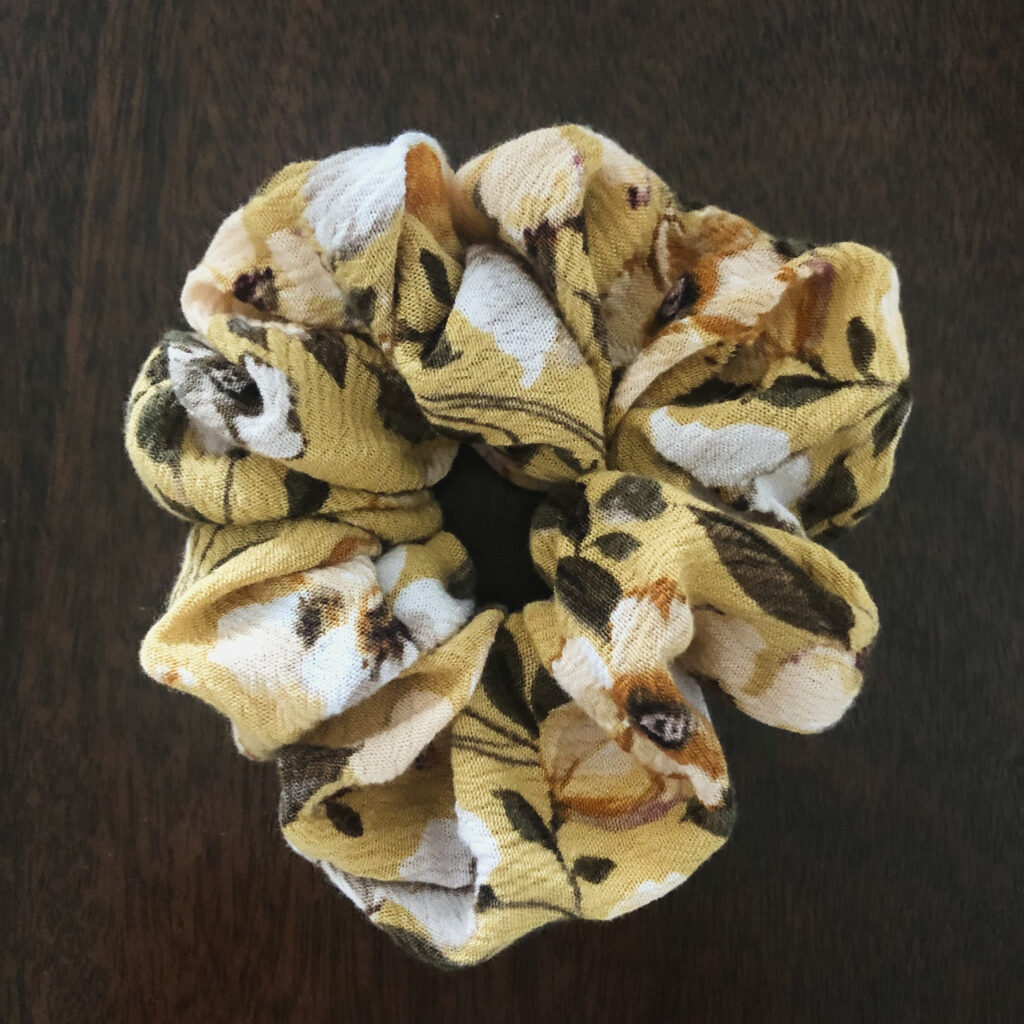
And, voila! You now have a perfectly adorable, big & fluffy, scrap fabric scrunchie. Enjoy!
How to: Easy Scrap Fabric Scrunchie
EQUIPMENT
- Sewing Machine
- Sewing Needle
- Rotary cutter & board or Scissors
Materials
- 1 Scrap fabric no smaller than 5×28 inch
- 1 Thread to match the fabric
- 1 Ponytail medium size
Instructions
- Cut out 1 rectangle of fabric, measuring 5×28 inches. Use a rotary cutter and mat to get a straight edge. Or, draw straight lines onto the fabric that mark the size of the rectangle, then cut along the lines using a pair of scissors.
- Connect the two sides that measure 5 inches by folding the fabric, while making sure that the pattern faces inwards. Pin in place.
- Sew the 2 sides together along the short edge (where it measures 5 inches) with a 1/8 seam allowance.
- Without turning the fabric inside out place a ponytail around the fabric.
- Fold each side of the fabric down by 1/4 inch. Connect the two sides and pin in place as you go. Do this across the whole scrunchie. (Once you are done you should have something that will resemble a scrunchie).
- Sew the 2 sides of the scrunchie together with a 1/8 inch seam allowance.
- Using a sewing needle, hide the two extra strings inside of the scrunchie. Cut any pieces that continue to hang out. (See notes if more detail is needed).
- Enjoy your new scrunchie!!
Did you enjoy this recipe? Pin it!