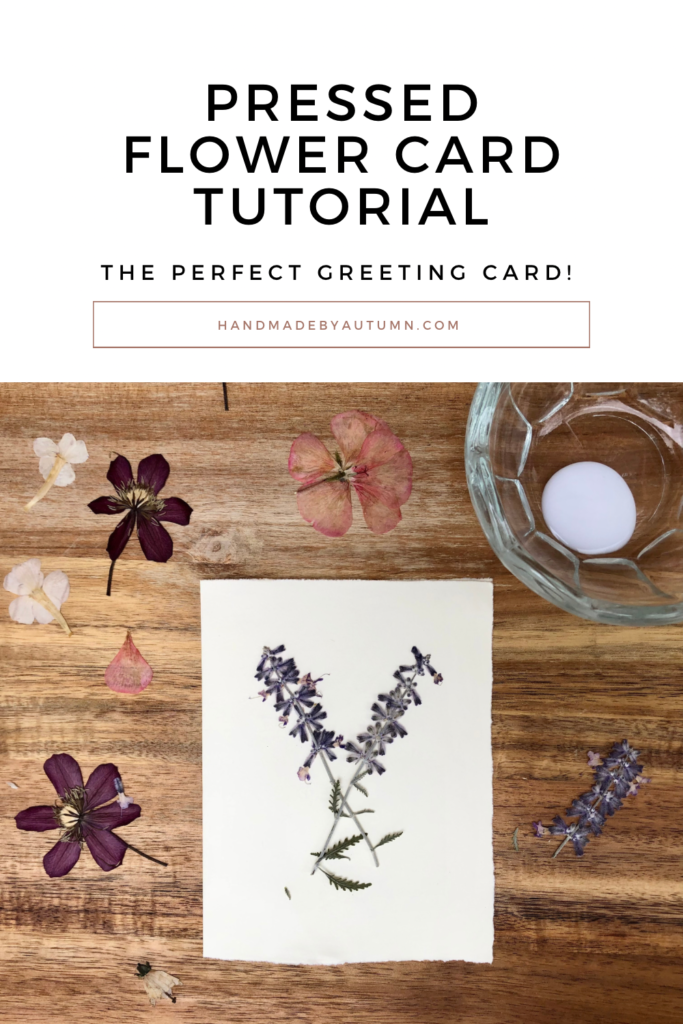
Easy Pressed Flower Cards are such a beautiful and heartfelt way to congratulate, sympathize, or to thank those in your life. And, these beautiful handmade cards are so easy to make- requiring only dried flowers, a clear glue, nice paper, and a small amount of your time. These Easy Pressed Flower Cards are my all-time favorites for birthdays, weddings, thank you’s, Mother’s Day, and more!

* * This page contains affiliate links. This means that if you order a product using one of the links on this page, I will receive a small commission at absolutely no extra cost to you. This is what allows me to continue creating content for you. Thank you and happy crafting! : ) * *
I absolutely love receiving and giving heartfelt gifts. I find the love and care behind these special gifts to be so, so beautiful.
After all, it isn’t every day that someone goes through all of the effort to find or make a gift with you especially in mind.
And, giving a gorgeous handmade card along with a heartfelt gift is simply pure icing on the cake.
There are so many different (and wonderful!) ways to make homemade cards, but one of my all-time favorite ways is with dried flowers.
Dried flowers are not only gorgeous, but they are also a wonderful way to further the life of the flowers from your garden or from a beautiful bouquet.
So, grab your flowers and supplies- we are going to make a bountiful stash of Easy Pressed Flower Cards! : )
Materials needed to make an Easy Pressed Flower Card
We only need a few materials to make pressed flower cards (most of which you may already have on hand!) These materials are:
- Pressed Flowers
- Clear Glue
- A Small Paintbrush
- Thick Paper or Cardstock, and
- Tweezers or a Q-tip (optional)
Tips for making an Easy Pressed Flower Card
Here are my top three tips for making beautiful, yet easy, pressed flower cards:
- Great creative with paper cutting techniques! My favorite way to “cut” the paper for these cards is to use the “fold & lick” method- I find that this method gives the cards a lovely rustic look. Other great options are to use a straight paper cutter, scissors, or decorative paper scissors.
- Arrange the flowers before gluing them. This will help you to find the perfect place for each flower before they are stuck to the page. Once each flower is in it’s proper place, you may remove them and glue them one by one to keep your lovely design in tack!
- Don’t use too much glue! Using too much glue may cause the edges of the flowers to curl or it may cause the paper to wrinkle- neither of which we want in these beautiful cards!
FAQ’s
Do I need to use craft glue to make a pressed flower card?
Craft glue will yield the best results, however it is not necessary to use. A liquid, clear school glue will work just as well!
Note: it is not recommended to use mod podge or a colored glue. Both may leave a visible film over the flowers.
What is the best paper to use for homemade cards?
For the best results, use cardstock or another type of thick paper. A basic printer paper can be used, however the thin paper will most likely wrinkle once the glue is dried.
What size should a homemade card be?
These cards can be however big or small you would like them to be!
However, if you would like more guidance, greeting cards typically come in 4 different sizes (see more here):
- 4.25″ x 5.5″
- 4.5″ x 6.25″
- 4.875″ x 3.375″
- 5″ x 7″
I, personally, found it the easiest to use an 11″ x 8.5″ paper, cut in half. (With each half being one card measuring ~4.25″ x 5.5″.)
What is the “fold & lick” paper cutting method?
The “fold & lick” paper cutting method is pretty simple- and you might even remember doing it in grade school!
Begin by folding the paper (either in half to make 2 cards, or simply along the edges of the paper to the give it a jagged look).
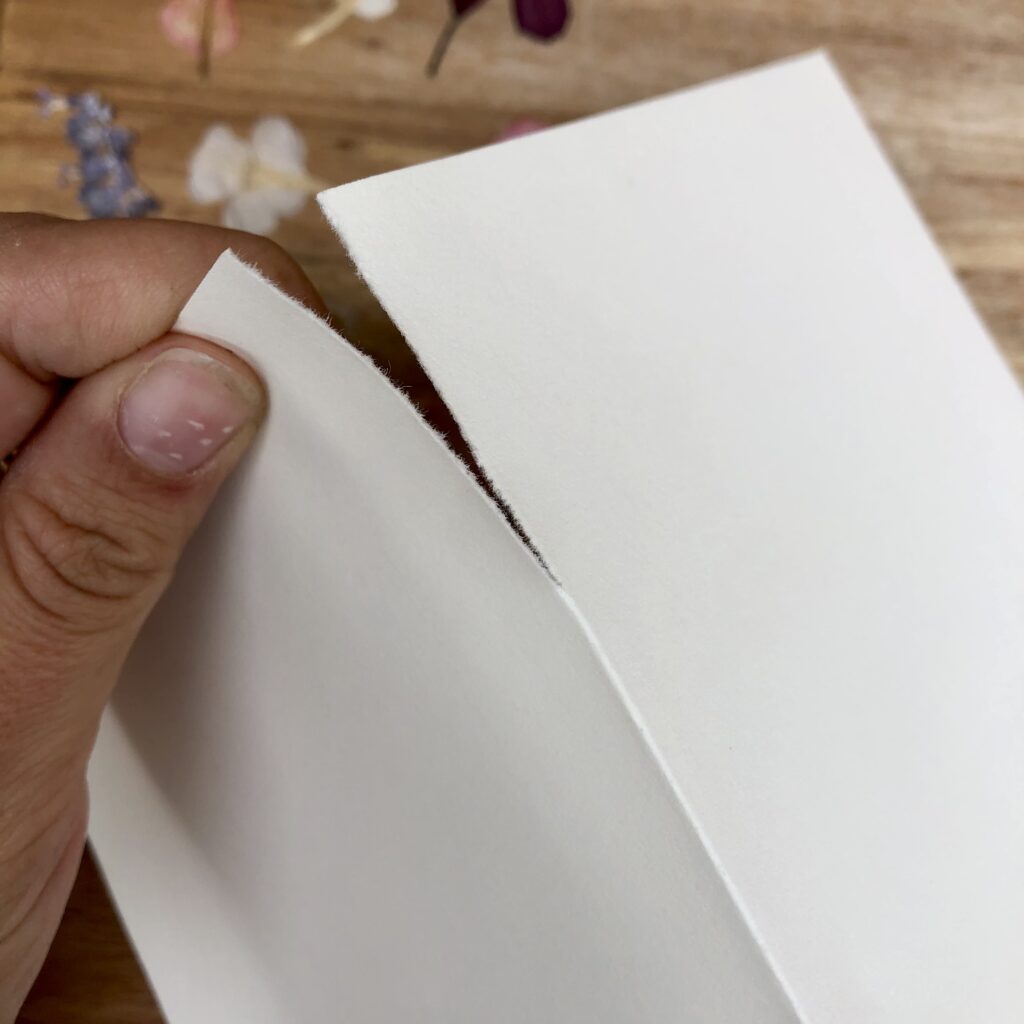
Then, lightly run your tongue along the fold of the paper to dampen it (much like licking an envelope). Open up the paper and fold it once again in the opposite direction. Now, lightly dampen this side of the fold with your tongue.
Then, carefully tear the paper along the dampened fold. I recommend going slowly so that paper doesn’t accidentally tear away from the fold. If you are finding it hard to tear the paper, fold it and dampen it once again.
And, there we have it! An easy way to “cut” paper without scissors!
Can I press my own flowers?
You most certainly can press your own flowers to use in one of these easy pressed flower cards! I find that pressing my own flowers gives the cards even more heart-felt, homemade sweetness.
Check out my tutorial on how to press flowers with a book by clicking here!
Where can I buy pressed flowers?
Buying pre-pressed flowers is a great option for last-minute card making (or for those who don’t want to go through the time and hassle of pressing their own!)
Here is a great list of places that you can buy pre-pressed, dried flowers:
- Pressed Flowers Bulk Dried from Amazon
- Resiners 100Pcs Dried Pressed Flowers from Amazon
- 100 PCS Set Pressed Flowers from Etsy
- Dried Pressed Flowers and Leaves from Etsy
DIY Easy Pressed Flower Cards
Materials
- Pressed Flowers
- Clear Glue
- Small Paintbrush
- Thick Paper or Cardstock
- Tweezers or a Q-tip (optional)
Instructions
- Begin by preparing your supplies. First, shape your paper or cardstock into a folded card. (See more about recommended card sizes here.) Second, choose which of the dried flowers you wish to put onto the card. Lay them to the side.Third, pour a small amount of glue into a shallow bowl, plate, painting plate or onto some paper.
- Next, prepare your design by laying the flowers out on the card. Try to find the perfect spot for each flower. (Tweezers may be helpful here as you move the flowers around.)Note: I recommend finding the perfect spot for each of the flowers before gluing any of them onto the card. This will help to ensure that the card is exactly how you want it before anything is irreversibly stuck on the paper!
- Now, it is time to glue the flowers onto the card. For most flowers, it will be easiest to pick the flower up and to "paint" a small amount of glue onto the paper where the flower will be placed. Then, gently lay the flower over the glue.Alternatively, you may put the glue directly onto the back of the flower (instead of the paper) before laying it onto the card. This method works the best for sturdier flowers.I recommend picking up each flower one-by-one as you are able. This will help your design to stay intact and to ensure proper spacing between each of the flowers.
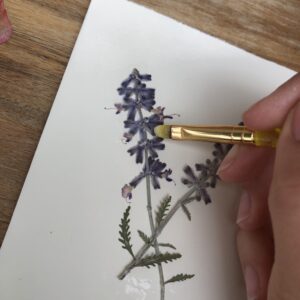
- Once all of the flowers are glued onto the card, I recommend gluing the tops of the flowers as well. This prevents the petals and leaves of the flowers from peeling off of the paper.Do this by gently "painting" a very small amount of glue over the flowers with a small paintbrush.Note: Do not paint the whole card with glue. For the best results, keep the paint as close to the flowers as possible. Excess glue may show on the paper.Note: Using too much glue may cause the petals of delicate flowers to curl. To prevent this, use as little glue as possible and add more as needed.
- Once all of the flowers are glued onto the card, allow it time to fully dry before moving the card around. Then, you may write a lovely message inside of the card.
- And, voila! You have a beautiful Easy Pressed Flower Card. : )

Did you make this craft? I would love to see it! You can email a picture to me directly at autumn@autumnshandmade or you tag/dm me on Instagram! : )
Is it possible to use spray glue on a card and then lay the flowers onto it, then perhaps once completely dry use a fine mist of hairspray over the top?
Hi, Rosalind!
My concern with using spray glue is that it could cause too much of the paper to wrinkle (depending on the strength of your paper). I would test the glue on a piece of paper first to ensure that it doesn’t react with the paper in an undesirable way. Please let me know if you try it:)