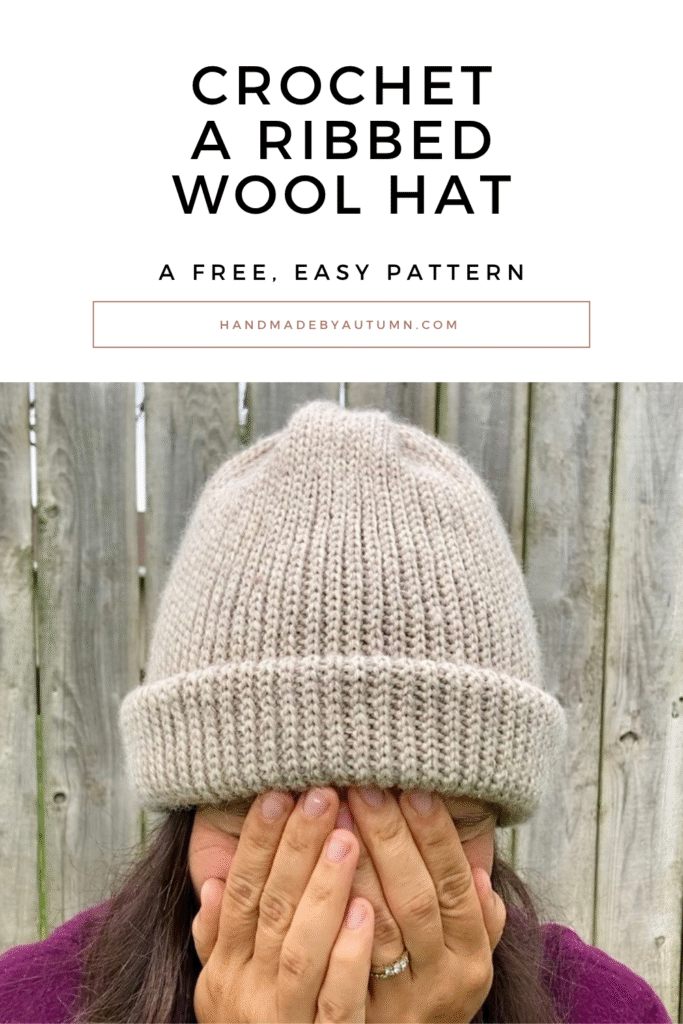
Learn how to Crochet a Ribbed Wool Hat with this super easy pattern! Wool hats are so warm and cozy in the winter months AND they are even better when homemade. Check out this pattern (perfect for beginners) today!

I’ve been slowly working my way towards changing my wardrobe from synthetic fibers to natural ones.
When I thought of switching out my winter hat, wool is the first thing that came to my mind! And, being that I live in the upper midwest where it gets quite chilly, wool is absolutely perfect.
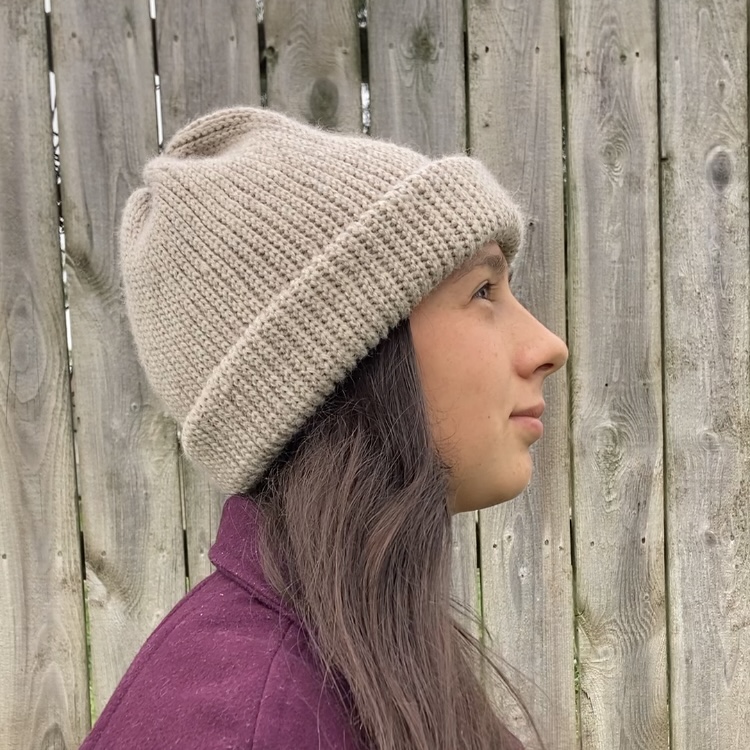
In all seriousness, this wool hat is the warmest hat that I’ve owned yet. AND the ribbed aspect of it is super cute and it’s so easy to make.
So, here’s to a homemade crochet ribbed wool hat! I pray that you enjoy it as much as I do.
FAQ’s
What crochet abbreviations are used in this pattern?
This is a very simple hat pattern with only one abbreviation used, which is:
SL ST = Slip Stitch
How long will it take to crochet a wool hat?
The time that it takes to crochet this hat depends largely on the thickness of the yarn. The yarn that I used required a 5 mm hook and the hat took roughly 5 hours to create.
Note that because a slip stitch is used for the entire hat, it will take longer to create than most crochet hats.
What size is this wool hat?
This crochet wool hat is one size fits all. Meaning, it should fit a standard sized adult head. (However, feel free to make the length of it longer or shorter depending on your needs.)
What is the best way to wash a crocheted wool hat?
The best way to wash a crochet wool hat is to hand wash it and let it air dry on a flat surface.
Tips
- To achieve a true “ribbed” look to the hat- make sure to only grab one side of each yarn (so there will only be one strand of yarn on the needle as opposed to two) when doing the slip stitches.
- This pattern creates a large rectangle before it becomes a hat. It is best to finish off the rectangle at the opposite end to which the rectangle began.
- Feel free to use a crochet hook in place of a yarn needle to weave the yarn in and out of the top of the hat while gathering it shut.
- Yarn is used to gather the top of the hat. If you are concerned about your yarns strength to tightly gather the hat, consider using fishing string in place of the yarn.
Materials
- Wool Yarn (I used this yarn here)
- Crochet Hook (size depending on yarn thickness)
- Scissors (for clipping the yarn)
- Yarn Needle (optional, may use crochet hook instead)
Directions + Pictures
Begin by Chaining 70.
Row 1 : Slip Stitch down the row. Chain 1 & turn.
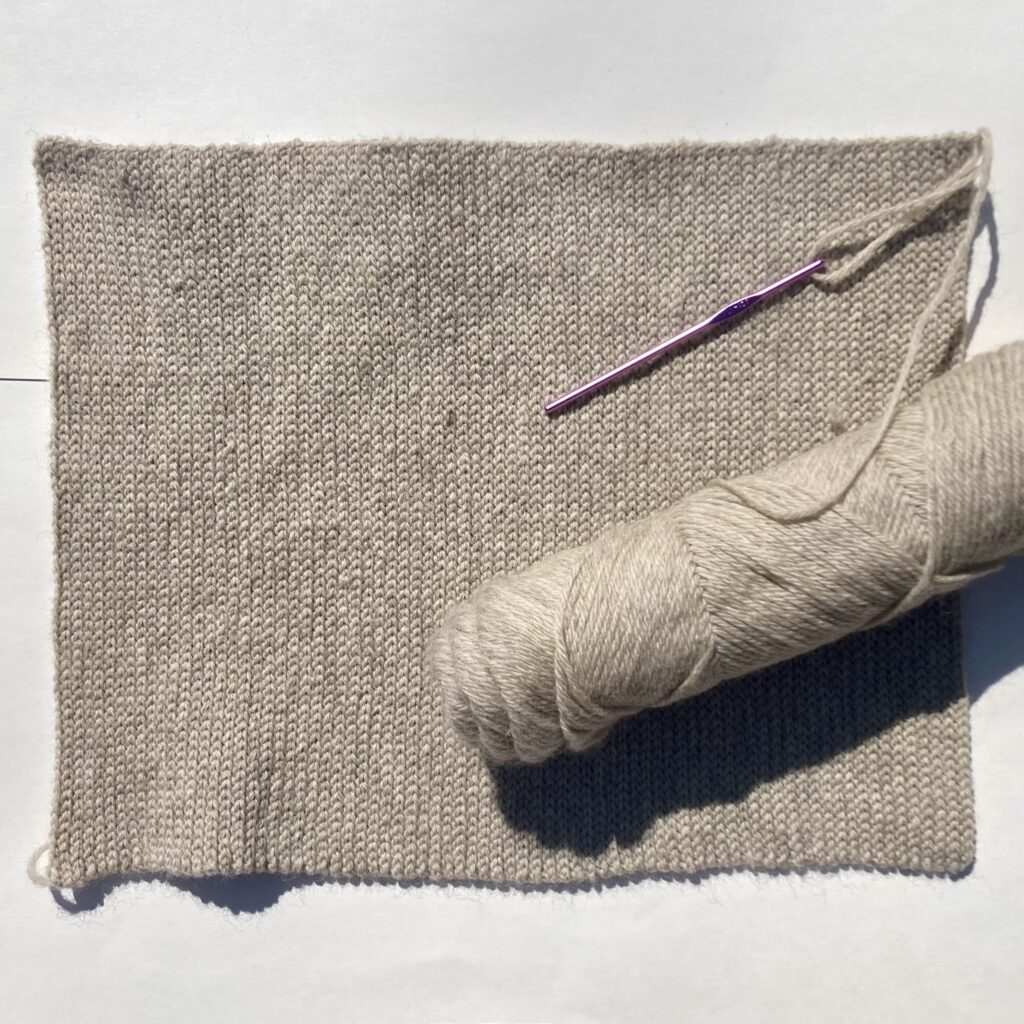
Row 2 – Miscellaneous : Slip Stitch down the side of the row, chain 1, turn, and repeat. Do this until the fabric measures 17 inches in length and looks similar to the picture below.
Note: it is very important to only stitch down one side of the yarn, if both pieces of yarn are grabbed, then the hat will not achieve a “ribbed” look. The side that is stitched should naturally rotate directions as a new row is begun.
Pro tip: finish off the rectangle at the opposite corner of where the pattern began. Once the hat is sewn shut, the open strings will then BOTH be left on the tip top of the hat.
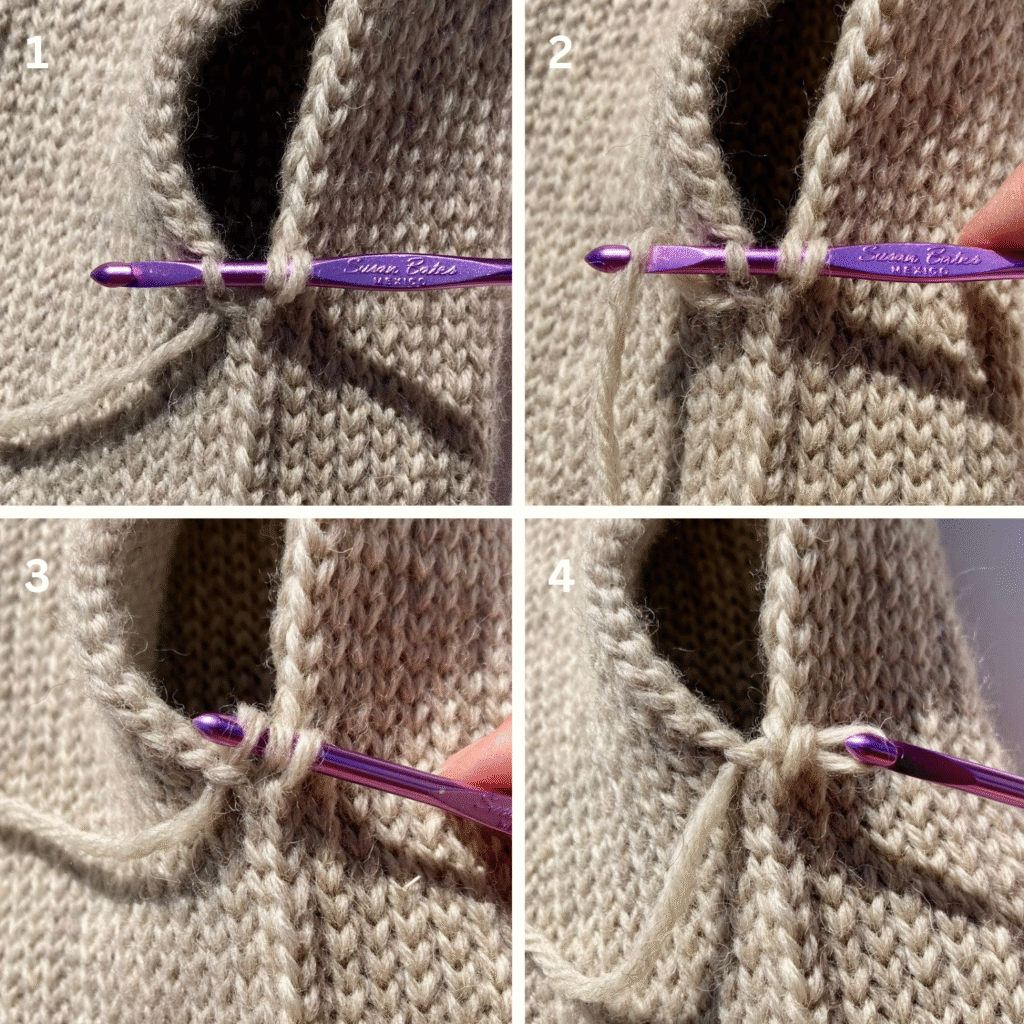
Next, fold the fabric in half while lining up the two open ends. Single Stitch Seam the two ends in order to create a tube shape.
See picture below for instructions on how to Slip Stitch Seam.
Once the two ends have been sewn shut, Chain 1, measure 15 inches of yarn, and clip the yarn at the measured length. This 15 inch long tail will be used to sew the top of the hat shut.
String the tail of the yarn through a Yarn Needle. Then, guide the needle through the open ends of the hat, while simultaneously gathering the hat shut. See the picture below for details.
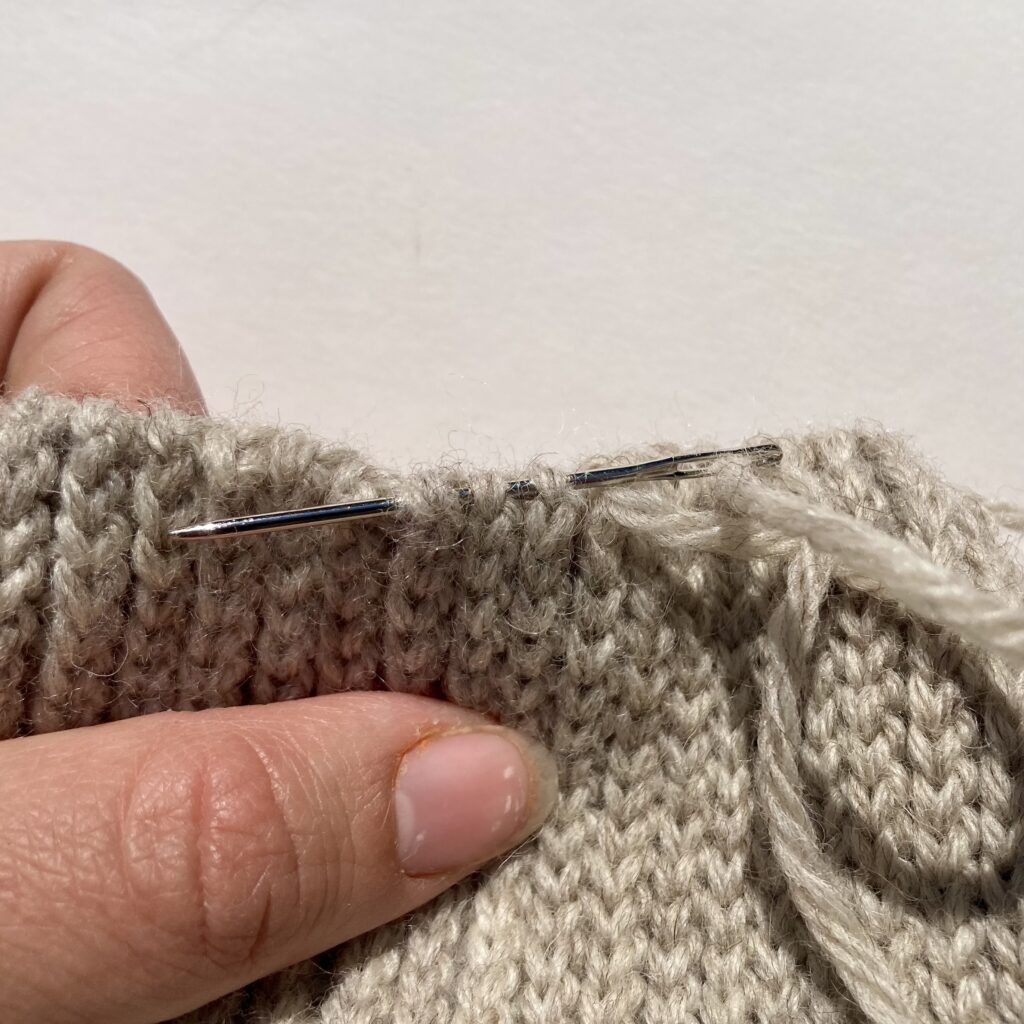
Once all of the yarn has been worked through the top of the hat, pull it shut as tightly as possible. Tie the yarn off to hold it in place (I prefer to tie the yarn onto the yarn that was left out at the start of the project.)
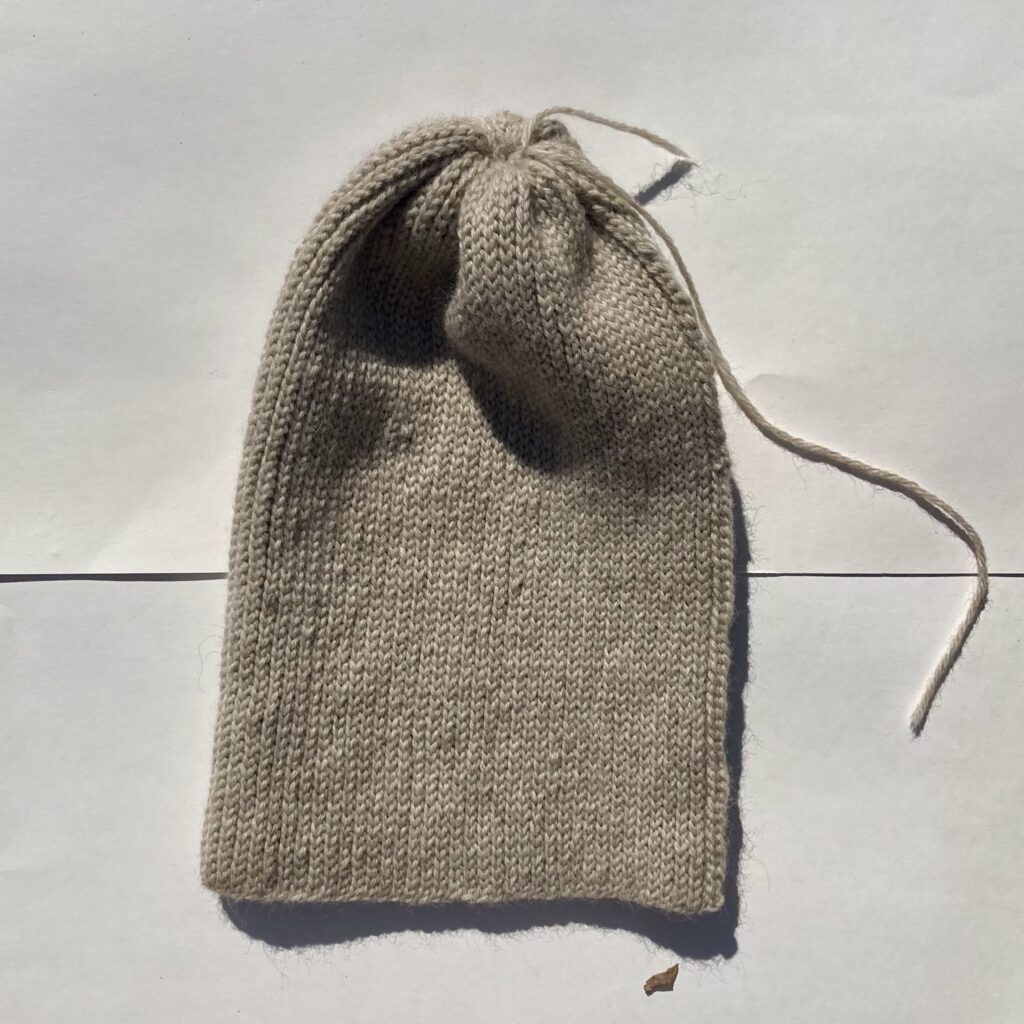
Tuck and clip the remaining yarn.
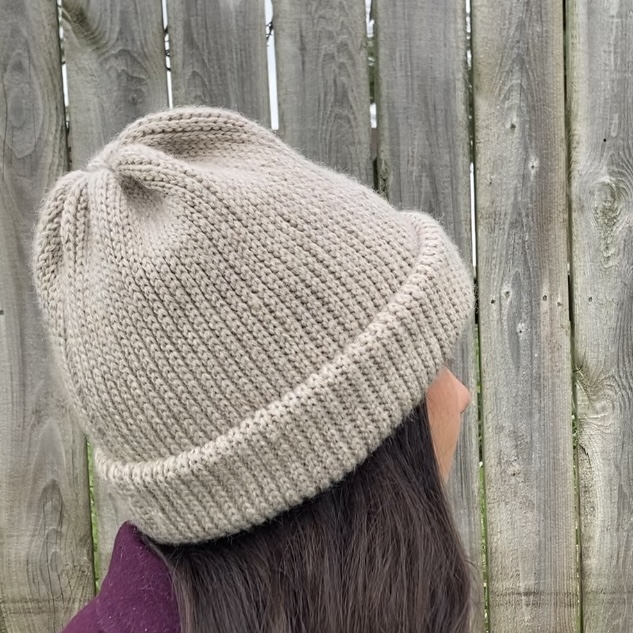
Fold the hat inside out, then roll up the bottom of the hat two times to create a brim.
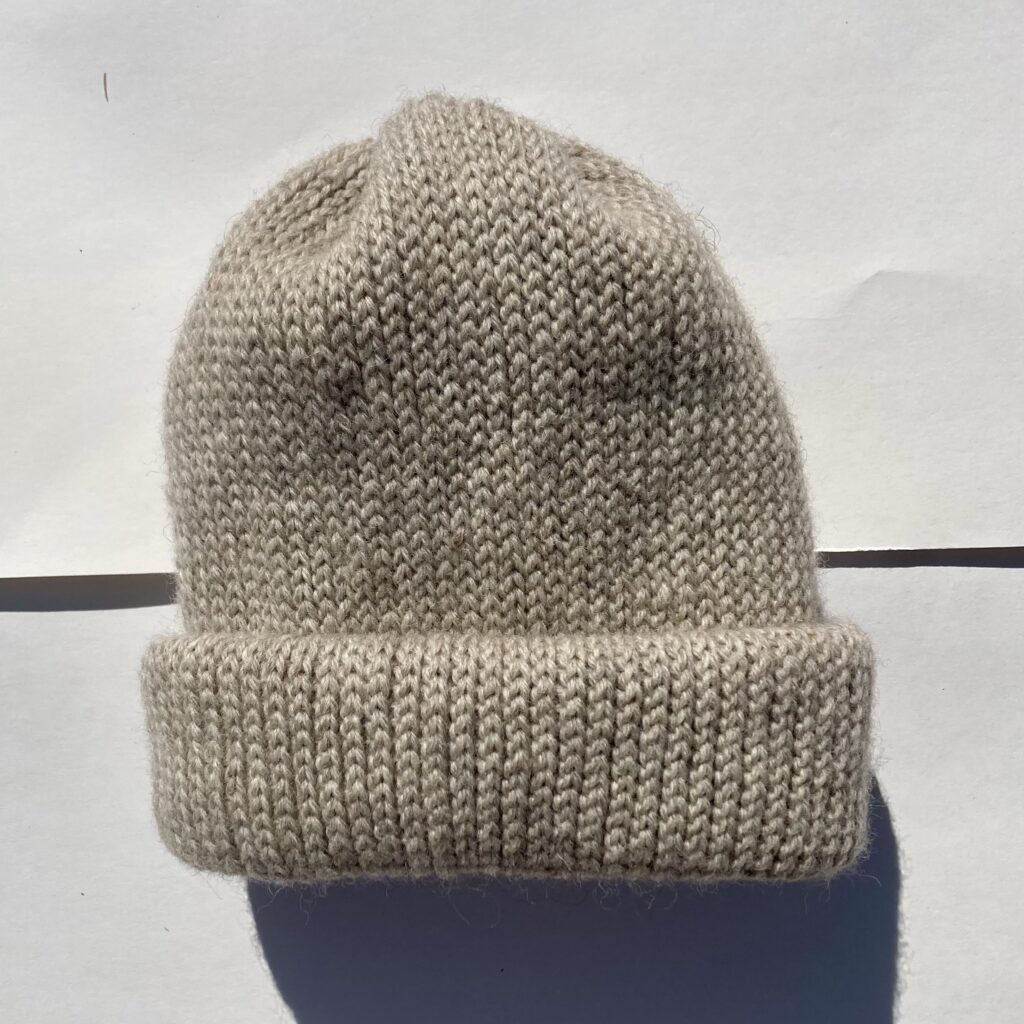
The finished hat should look as shown below!

Crochet a Ribbed Wool Hat
Materials
- Wool Yarn (I used this yarn here)
- Crochet Hook (size depends on yarn thickness)
- Scissors
- Yarn Needle (optional)
Instructions
- Chain 70
- Row 1 : SL ST down row, Chain 1, turn.
- Row 2 – misc. : SL ST down row [only catching one side of the stitch as opposed to both], Chain 1, turn, and repeat.
- Continue the 3rd step until the length of the hat measures 17 inches.
- SL ST Seam the two short ends together.
- Clip the yarn, but leave a long tail for sewing (a 15 inch long tail is best).
- Use the remaining yarn to weave in and out of one end of the hat. Pull the yarn tight to gather the hat together.
- Tightly tie the remaining yarn in place. Clip and tuck what remains.
- Turn hat inside out and flip the edges over twice.Enjoy!
Notes